User:Cibajs: Difference between revisions
Jump to navigation
Jump to search
Garage Preview
Garage Preview
Garage Preview
Garage Preview
Garage Preview
Garage Preview
Garage Preview
Garage Preview
Garage Preview
Garage Preview
(testing) |
(testing) |
||
| Line 1: | Line 1: | ||
[[Template:KitInfo]] | |||
''Main article:'' '''[[Product kits]]''' | ''Main article:'' '''[[Product kits]]''' | ||
__NOTOC__ | |||
{{KitInfo | {{KitInfo | ||
|shop-icon=Prometheus.png | |shop-icon=Prometheus.png | ||
| Line 11: | Line 13: | ||
|playstyle=The combination of Hunter and Firebird excels in mobility and damage, but it lacks armor. Hunter's speed allows you to get in the Firebird's range and destroy enemies quickly with it's damage. | |playstyle=The combination of Hunter and Firebird excels in mobility and damage, but it lacks armor. Hunter's speed allows you to get in the Firebird's range and destroy enemies quickly with it's damage. | ||
For more information read [[How to Use Hunter (Tips and Tricks)]] or [[How to Use Firebird (Tips and Tricks)]]. | For more information read [[How to Use Hunter (Tips and Tricks)]] or [[How to Use Firebird (Tips and Tricks)]]. | ||
|rez1={{!}}{{!}} <center>{{Prot|Firebird|Firebird|50%}}</center> | |||
|rez2={{!}}{{!}} <center>{{Prot|Freeze|Freeze|25%}}</center> | |||
|rez3={{!}}{{!}} <center>{{Prot|Smoky|Smoky|25%}}</center> | |||
|kit-preview=Prometheus.png | |kit-preview=Prometheus.png | ||
}} | }} | ||
<br> | |||
==Gap== | |||
''Main article:'' '''[[Product kits]]''' | |||
{{KitInfo | |||
|shop-icon=Boreas.png | |||
|turret=[[Freeze|Freeze M3]] | |||
|hull=[[Wasp|Wasp M3]] | |||
|paint=[[Taiga]] | |||
|price=399 540 [[File:Crysmini.png|link=]] | |||
|benefit=266 360 [[File:Crysmini.png|link=]] | |||
|unlock-lock-rank=[[File:IconMini_25.png|link=[[Ranks]]]] - [[File:IconMini_27.png|link=[[Ranks]]]] | |||
|playstyle=Wasp's high mobility allows you to move in circles around your slowed enemies, and destroy them without losing much HP.<br> | |||
For more information read [[How to Use Wasp (Tips and Tricks)]] or [[How to Use Freeze (Tips and Tricks)]]. | |||
|rez1={{!}}{{!}} <center>{{Prot|Isida|Isida|35%}}</center> | |||
|rez2={{!}}{{!}} <center>{{Prot|Ricochet|Ricochet|24%}}</center> | |||
|rez3={{!}}{{!}} <center>{{Prot|Firebird|Firebird|24%}}</center> | |||
|rez4={{!}}{{!}} <center>{{Prot|Twins|Twins|17%}}</center> | |||
|kit-preview=Boreas.png | |||
}} | |||
<br> | |||
==Gap== | |||
''Main article:'' '''[[Product kits]]''' | |||
{{KitInfo | |||
|shop-icon=Medic.png | |||
|turret=[[Isida|Isida M3]] | |||
|hull=[[Wiking|Wiking M3]] | |||
|paint=[[Picasso]] | |||
|price=429 120 [[File:Crysmini.png|link=]] | |||
|benefit=286 080 [[File:Crysmini.png|link=]] | |||
|unlock-lock-rank=[[File:IconMini_27.png|link=[[Ranks]]]] - [[File:IconMini_29.png|link=[[Ranks]]]] | |||
|playstyle=This kit is the perfect example of an efficient healing combination, that can still effectively defend and repair itself.<br> | |||
For more information read [[How to Use Wiking (Tips and Tricks)]] or [[How to Use Isida (Tips and Tricks)]]. | |||
|rez1={{!}}{{!}} <center>{{Prot|Shaft|Shaft|33%}}</center> | |||
|rez2={{!}}{{!}} <center>{{Prot|Railgun|Railgun|27%}}</center> | |||
|rez3={{!}}{{!}} <center>{{Prot|Freeze|Freeze|20%}}</center> | |||
|rez4={{!}}{{!}} <center>{{Prot|Thunder|Thunder|20%}}</center> | |||
|kit-preview=Medic.png | |||
}} | |||
<br> | |||
==Gap== | |||
''Main article:'' '''[[Product kits]]''' | |||
{{KitInfo | |||
|shop-icon=Destroyer.png | |||
|turret=[[Twins|Twins M3]] | |||
|hull=[[Mammoth|Mammoth M3]] | |||
|paint=[[Lumberjack]] | |||
|price=401 040 [[File:Crysmini.png|link=]] | |||
|benefit=267 360 [[File:Crysmini.png|link=]] | |||
|unlock-lock-rank=[[File:IconMini_26.png|link=[[Ranks]]]] - [[File:IconMini_28.png|link=[[Ranks]]]] | |||
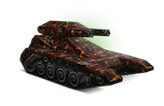
|playstyle=This combination excels in small maps, where you don't have to travel far to unleash your huge damage per second and use your armor to provide cover for your teammates.<br> | |||
For more information read [[How to Use Mammoth (Tips and Tricks)]] or [[How to Use Twins (Tips and Tricks)]]. | |||
|rez1={{!}}{{!}} <center>{{Prot|Firebird|Firebird|30%}}</center> | |||
|rez2={{!}}{{!}} <center>{{Prot|Freeze|Freeze|30%}}</center> | |||
|rez3={{!}}{{!}} <center>{{Prot|Isida|Isida|30%}}</center> | |||
|rez4={{!}}{{!}} <center>{{Prot|Vulcan_rez|Vulcan|10%}}</center> | |||
|kit-preview=Destroyer.png | |||
}} | |||
<br> | |||
==Gap== | |||
''Main article:'' '''[[Product kits]]''' | |||
{{KitInfo | |||
|shop-icon=Legend.png | |||
|turret=[[Railgun|Railgun M3]] | |||
|hull=[[Hornet|Hornet M3]] | |||
|paint=[[Prodigi]] | |||
|price=402 220 [[File:Crysmini.png|link=]] | |||
|benefit=216 580 [[File:Crysmini.png|link=]] | |||
|unlock-lock-rank=[[File:IconMini_23.png|link=[[Ranks]]]] - [[File:IconMini_25.png|link=[[Ranks]]]] | |||
|playstyle=This kit is made for XP/BP and BP matches. In normal matches it is best used for capturing flags or chasing down low hp enemies.<br> | |||
For more information read [[How to Use Hornet (Tips and Tricks)]] or [[How to Use Railgun (Tips and Tricks)]]. | |||
|rez1={{!}}{{!}} <center>{{Prot|Railgun|Railgun|50%}}</center> | |||
|rez2={{!}}{{!}} <center>{{Prot|Thunder|Thunder|23%}}</center> | |||
|rez3={{!}}{{!}} <center>{{Prot|Shaft|Shaft|20%}}</center> | |||
|rez4={{!}}{{!}} <center>{{Prot|Firebird|Firebird|7%}}</center> | |||
|kit-preview=Legend.png | |||
}} | |||
<br> | |||
==Gap== | |||
''Main article:'' '''[[Product kits]]''' | |||
{{KitInfo | |||
|shop-icon=Cyclops.png | |||
|turret=[[Shaft|Shaft M2]] | |||
|hull=[[Mammoth|Mammoth M2]] | |||
|paint=[[Blacksmith]] | |||
|price=187 470 [[File:Crysmini.png|link=]] | |||
|benefit=124 980 [[File:Crysmini.png|link=]] | |||
|unlock-lock-rank=[[File:IconMini_19.png|link=[[Ranks]]]] - [[File:IconMini_21.png|link=[[Ranks]]]] | |||
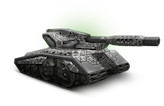
|playstyle=With high HP and low mobility, your advantage lies in holding the objectives and delivering high damage shots to control the battlefield.<br> | |||
For more information read [[How to Use Mammoth (Tips and Tricks)]] or [[How to Use Shaft (Tips and Tricks)]]. | |||
|rez1={{!}}{{!}} <center>{{Prot|Vulcan_rez|Vulcan|40%}}</center> | |||
|rez2={{!}}{{!}} <center>{{Prot|Shaft|Shaft|26%}}</center> | |||
|rez3={{!}}{{!}} <center>{{Prot|Railgun|Railgun|18%}}</center> | |||
|kit-preview=Cyclops.png | |||
}} | |||
<br> | |||
==Gap== | |||
''Main article:'' '''[[Product kits]]''' | |||
{{KitInfo | |||
|shop-icon=Piranha.png | |||
|turret=[[Shaft|Shaft M1]] | |||
|hull=[[Hornet|Hornet M1]] | |||
|paint=[[Corrosion]] | |||
|price=42 955 [[File:Crysmini.png|link=]] | |||
|benefit=35 145 [[File:Crysmini.png|link=]] | |||
|unlock-lock-rank=[[File:IconMini_11.png|link=[[Ranks]]]] - [[File:IconMini_14.png|link=[[Ranks]]]] | |||
|playstyle=This combination is capable of delivering huge damage in one shot and relocate to fire from a different location, to always force the enemy to be on the lookout. | |||
For more information read [[How to Use Hornet (Tips and Tricks)]] or [[How to Use Shaft (Tips and Tricks)]]. | |||
|rez1={{!}}{{!}} <center>{{Prot|Thunder|Thunder|15%}}</center> | |||
|rez2={{!}}{{!}} <center>{{Prot|Shaft|Shaft|15%}}</center> | |||
|rez3={{!}}{{!}} <center>{{Prot|Railgun|Railgun|10%}}</center> | |||
|kit-preview=Piranha.png | |||
}} | |||
<br> | |||
==Gap== | |||
''Main article:'' '''[[Product kits]]''' | |||
{{KitInfo | |||
|shop-icon=Almighty.png | |||
|turret=[[Twins|Twins M0]] | |||
|hull=[[Dictator|Dictator M0]] | |||
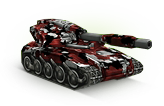
|paint=[[Magma]] | |||
|price=945 [[File:Crysmini.png|link=]] | |||
|benefit=1150 [[File:Crysmini.png|link=]] | |||
|unlock-lock-rank=[[File:IconMini_2.png|link=[[Ranks]]]] - [[File:IconMini_5.png|link=[[Ranks]]]] | |||
|playstyle=With amazing damage per second and Dictator's height this kit can engage enemies from many different angles.<br> | |||
For more information read [[How to Use Dictator (Tips and Tricks)]] or [[How to Use Twins (Tips and Tricks)]]. | |||
|rez1={{!}}{{!}} <center>{{Prot|HammerProt|Hammer|12%}}</center> | |||
|kit-preview=Almighty.png | |||
}} | |||
<br> | |||
==Gap== | |||
''Main article:'' '''[[Product kits]]''' | |||
{{KitInfo | |||
|shop-icon=Bumblebee.png | |||
|turret=[[Hammer|Hammer M3]] | |||
|hull=[[Hornet|Hornet M3]] | |||
|paint=[[Hive]] | |||
|price=339 680 [[File:Crysmini.png|link=]] | |||
|benefit=277 920 [[File:Crysmini.png|link=]] | |||
|unlock-lock-rank=[[File:IconMini_21.png|link=[[Ranks]]]] - [[File:IconMini_23.png|link=[[Ranks]]]] | |||
|playstyle=Using Hornet's great mobility you can rush towards enemies and use the amazing burst damage to destroy them quickly and run away to reload.<br> | |||
For more information read [[How to Use Hunter (Tips and Tricks)]] or [[How to Use Firebird (Tips and Tricks)]]. | |||
|rez1={{!}}{{!}} <center>{{Prot|Vulcan_rez|Vulcan|42%}}</center> | |||
|rez2={{!}}{{!}} <center>{{Prot|Ricochet|Ricochet|32%}}</center> | |||
|rez3={{!}}{{!}} <center>{{Prot|Freeze|Freeze|26%}}</center> | |||
|kit-preview=Bumblebee.png | |||
}} | |||
<br> | |||
==Gap== | |||
''Main article:'' '''[[Product kits]]''' | |||
{{KitInfo | |||
|shop-icon=Guard.png | |||
|turret=[[Thunder|Thunder M2]] | |||
|hull=[[Titan|Titan M2]] | |||
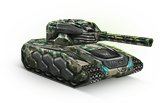
|paint=[[Urban]] | |||
|price=309 600 [[File:Crysmini.png|link=]] | |||
|benefit=206 400 [[File:Crysmini.png|link=]] | |||
|unlock-lock-rank=[[File:IconMini_17.png|link=[[Ranks]]]] - [[File:IconMini_19.png|link=[[Ranks]]]] | |||
|playstyle=With Thunder's splash damage you can easily get rid of enemies on objectives and hold them for your team with your great amount of HP.<br> | |||
For more information read [[How to Use Hunter (Tips and Tricks)]] or [[How to Use Firebird (Tips and Tricks)]]. | |||
|rez1={{!}}{{!}} <center>{{Prot|Twins|Twins|32%}}</center> | |||
|rez2={{!}}{{!}} <center>{{Prot|Isida|Isida|15%}}</center> | |||
|rez3={{!}}{{!}} <center>{{Prot|Ricochet|Ricochet|10%}}</center> | |||
|rez4={{!}}{{!}} <center>{{Prot|Firebird|Firebird|10%}}</center> | |||
|kit-preview=Guard.png | |||
}} | |||
<br> | |||
Revision as of 23:13, 30 April 2024
Main article: Product kits
General Information
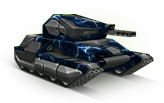
Turret: Firebird M3
Hull: Hunter M3
Paint: Zeus
Ranks:  -
- 
Price: 309 600 
Price benefit: 206 400
Information
| Recommendations | |
|---|---|
| DM | |
| TDM | |
| CTF | |
| CP | |
| Small maps | |
| Medium maps | |
| Large maps | |
| Paint Protections | |||
|---|---|---|---|
Kit Preview
Gap
Main article: Product kits
Information
| Recommendations | |
|---|---|
| DM | |
| TDM | |
| CTF | |
| CP | |
| Small maps | |
| Medium maps | |
| Large maps | |
| Paint Protections | |||
|---|---|---|---|
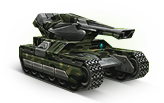
Kit Preview
Gap
Main article: Product kits
Information
| Recommendations | |
|---|---|
| DM | |
| TDM | |
| CTF | |
| CP | |
| Small maps | |
| Medium maps | |
| Large maps | |
| Paint Protections | |||
|---|---|---|---|
Kit Preview
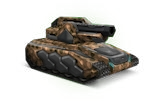
Gap
Main article: Product kits
General Information
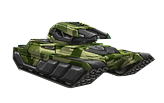
Turret: Twins M3
Hull: Mammoth M3
Paint: Lumberjack
Ranks:  -
- 
Price: 401 040
Price benefit: 267 360
Information
| Recommendations | |
|---|---|
| DM | |
| TDM | |
| CTF | |
| CP | |
| Small maps | |
| Medium maps | |
| Large maps | |
| Paint Protections | |||
|---|---|---|---|
Kit Preview
Gap
Main article: Product kits
General Information
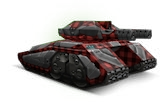
Turret: Railgun M3
Hull: Hornet M3
Paint: Prodigi
Ranks: - 
Price: 402 220
Price benefit: 216 580
Information
| Recommendations | |
|---|---|
| DM | |
| TDM | |
| CTF | |
| CP | |
| Small maps | |
| Medium maps | |
| Large maps | |
| Paint Protections | |||
|---|---|---|---|
Kit Preview
Gap
Main article: Product kits
General Information
Turret: Shaft M2
Hull: Mammoth M2
Paint: Blacksmith
Ranks:  -
-
Price: 187 470
Price benefit: 124 980
Information
| Recommendations | |
|---|---|
| DM | |
| TDM | |
| CTF | |
| CP | |
| Small maps | |
| Medium maps | |
| Large maps | |
| Paint Protections | |||
|---|---|---|---|
Kit Preview
Gap
Main article: Product kits
Information
| Recommendations | |
|---|---|
| DM | |
| TDM | |
| CTF | |
| CP | |
| Small maps | |
| Medium maps | |
| Large maps | |
| Paint Protections | |||
|---|---|---|---|
Kit Preview
Gap
Main article: Product kits
General Information
Turret: Twins M0
Hull: Dictator M0
Paint: Magma
Ranks:  -
- 
Price: 945
Price benefit: 1150
Information
| Recommendations | |
|---|---|
| DM | |
| TDM | |
| CTF | |
| CP | |
| Small maps | |
| Medium maps | |
| Large maps | |
| Paint Protections | |||
|---|---|---|---|
Kit Preview
Gap
Main article: Product kits
Information
| Recommendations | |
|---|---|
| DM | |
| TDM | |
| CTF | |
| CP | |
| Small maps | |
| Medium maps | |
| Large maps | |
| Paint Protections | |||
|---|---|---|---|
Kit Preview
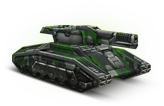
Gap
Main article: Product kits
General Information
Turret: Thunder M2
Hull: Titan M2
Paint: Urban
Ranks:  -
-
Price: 309 600
Price benefit: 206 400
Information
| Recommendations | |
|---|---|
| DM | |
| TDM | |
| CTF | |
| CP | |
| Small maps | |
| Medium maps | |
| Large maps | |
| Paint Protections | |||
|---|---|---|---|
Kit Preview