An Analysis on Kit Progression
Last update: 07/30/2024
Main article: Product kits, Tips and Guides
See also: Turrets, Hulls, Paints, Garage, Ranks
Introduction
Upgrading or purchasing new equipment in ProTanki is essential for improving your performance in battles. As you rank up, you face tougher opponents with better gear. While it might be tempting to purchase your desired equipment separately, there are several disadvantages compared to buying a complete equipment set from a product kit:
- Equipment from product kits becomes available earlier than individual purchases, often 2-3 ranks ahead of when the same equipment can be bought separately. Some paints, normally unlocked at higher ranks, can be obtained early by purchasing a kit that includes them.
- Individual equipment discounts are only available during festives and sales, which occur infrequently. Product kits, however, are always discounted. Additionally, the discount rate during sales is usually lower than the standard discount offered for kits.
- When purchasing equipment individually, you must own earlier versions to unlock later ones. Kits, however, bypass this requirement. For example, purchasing the Prometheus kit allows you to obtain Firebird M3 directly, even if you do not own Firebird M0.
However, product kits require you to purchase multiple pieces of equipment as a bundle, which may include items you do not need or want. This article will evaluate the equipment included in these kits and identify the most effective combinations for battle.
Criterion for Optimal Kit Progression
It is subjective to define the 'best' kit progression, as players may have different play styles and preferences for specific turrets. However, for this purpose, we will use the following criterion:
An upgrade is considered "optimal" if it objectively receives a significant boost in statistics compared to its previous version.
Rank Order of Upgrades
To identify which upgrades are the most effective or powerful, we must first understand the order in which they become available.
Take a look at an excerpt of Isida's table of characteristics:
| Modification | M0 | M1 | M2 | M3 |
|---|---|---|---|---|
| Available from |  Corporal Corporal
|
 Warrant Officer 1 Warrant Officer 1
|
 Third Lieutenant Third Lieutenant
|
 General General
|
| Rank Difference | - | 7 | 7 | 8 |
What about Mammoth?
| Modification | M0 | M1 | M2 | M3 |
|---|---|---|---|---|
| Available from |  Sergeant Sergeant
|
 Warrant Officer 3 Warrant Officer 3
|
 Major Major
|
 Field Marshal Field Marshal
|
| Rank Difference | - | 7 | 7 | 8 |
It can be seen that the rank differences between each upgrade are either 7 or 8. There are 30 ranks distributed across 4 equipment levels. M0/M1 equipment spans 7 ranks, while M2/M3 spans 8. This phenomenon is not exclusive to Isida and Mammoth but is prevalent amongst every turret and hull. The rank difference for equipment upgrades follows a linear progression, so the order of unlocking is consistent, as follows:
| Tier | Period | Turrets | Hulls |
|---|---|---|---|
| Tier 1 | Early | Smoky, Firebird | Hunter |
| Tier 2 | Twins | Wasp | |
| Tier 3 | Middle | Railgun, Hammer | Titan |
| Tier 4 | Isida, Vulcan | Dictator | |
| Tier 5 | Late | Freeze, Thunder | Hornet |
| Tier 6 | Ricochet | Mammoth | |
| Tier 7 | Shaft | Viking | |
| Tier 8 (Only M2/M3) | - | - | - |
Optimal Upgrades
It makes sense that equipment/upgrades unlocked earlier have weaker stats, prompting players to progress in ranks to obtain stronger equipment. This is also the case in the game. Take Hunter and Viking as an example. They are unlocked at Tier 1 and Tier 7 within a rank bracket, creating a significant gap of 6 ranks between them. This is also the reason why Hunter M1 usually has stats similar to Viking M0 because merely 1-2 ranks after unlocking Viking M1, you unlock Hunter M2. In simple terms, equipment unlocked early in the tier is always weaker than equipment unlocked later in the tier.
However, such a statement cannot be applied at the M3 level, which is the final level that equipment can be upgraded to. It is not possible to have a Hunter M4 that provides greater stats than a Viking M3 because all equipment is balanced at the M3 level. To balance the playing field and ensure all equipment at M3 is equally desirable, equipment receives stat adjustments, with lower-tier equipment receiving larger buffs and higher-tier equipment receiving smaller buffs.
This means that an early M3 upgrade in a lower tier provides a larger buff than a late M3 upgrade in a higher tier, making it the 'optimal' upgrade. On the other hand, a late M2 upgrade in a higher tier can provide a buff comparable to its M3 counterpart, making it an 'optimal' upgrade as well. For equipment with lower upgrade level, it typically doesn't matter whether you choose a low-tier or high-tier upgrade, as the difference is minimal, but for reasons we will show later, high-tier equipment is the normality for the "optimal" kit progression.
To back up the claims above, we can visualize the statistics of different tiers hull upgrades through a table.
| Hull | Parameters | M0 | M1 | M2 | M3 |
|---|---|---|---|---|---|
| Hunter (Tier 1) | 144 | 187 | 230 | 285 | |
| Increase | - | 43 | 43 | 55 | |
| Speed | 8.0 | 8.6 | 9.2 | 10.0 | |
| Increase | - | 0.6 | 0.6 | 0.8 | |
| Optimal Upgrade? | - | No | No | Yes | |
| Dictator (Tier 4) | 188 | 243 | 298 | 345 | |
| Increase | - | 55 | 55 | 47 | |
| Speed | 7.0 | 7.3 | 7.7 | 8.0 | |
| Increase | - | 0.3 | 0.4 | 0.3 | |
| Optimal Upgrade? | - | Depends | Slightly Yes | Slightly No | |
| Viking (Tier 7) | 194 | 244 | 294 | 315 | |
| Increase | - | 50 | 50 | 26 | |
| Speed | 7.8 | 8.3 | 8.8 | 9.0 | |
| Increase | - | 0.5 | 0.5 | 0.2 | |
| Optimal Upgrade? | - | Yes | Yes | No |
Kit Progression for M0
When a new account is created, everyone gains access to Smoky and Hunter M0. Theoretically, it is possible to use this combination until reach the M1 tierIt is recommended to purchase a single kit that offers strong damage, , and mobility, which can be used effectively through the mid or late stages of M1.; however, Smoky and Hunter are at the bottom of the Tier list, and their M0 versions are especially weak compared to others. Therefore, it is recommended to purchase a single kit that offers strong damage, , and mobility, which can be used effectively through the mid or late stages of M1.
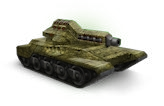
In early ranks, only a limited number of maps are available for play. These maps are usually smaller in size and have many obstacles, making it difficult for longer-ranged turrets to hit their targets. Considering this, the Commando kit stands out among all M0 kits, as it includes Ricochet M0, Viking M0, and Dragon, which are all considered top-tier equipment within the M0 range. Analyzing the characteristics of each piece of equipment, we find:
- Ricochet: It has decent range with burst damage comparable to that of melee turrets, making it a good choice for small and medium maps commonly found in low ranks. It can also shoot behind obstacles which are present in such maps.
- Viking: This hull has higher than Hunter M1 and Dictator M0 while boasting great mobility. It is the best hull for M0 and early M1.
- Dragon: This paint contains 22% protection against Ricochet, making it a good paint to equip as it can protect against strong enemy Ricochets.
Kit Progression for M1
Update: There is an alternative kit progression that diverges from the standard one starting at M1. For more information, refer to the following section here.
Knight and Piranha
Starting from M1, a larger variety of popular maps is unlocked, including ones with larger dimensions. Having only 1 turret can no longer suffice, and it is recommended to purchase 2 turrets, preferably one with long range and another with short range. Similarly, having both a light and medium hull will allow to adapt to different maps and situations.
The trend from M0 continues into M1 and M2, where higher-tier equipment generally outperforms lower-tier ones. However, higher-tier equipment reaches its zenith at M2, and the difference between M2 and M3 is not as significant. Therefore, it is recommended to save crystals for purchasing late M2 kits, which can better fulfill the needs of players in early M2, and to acquire late M1 kits that can bridge the gap until mid-late M2.
By considering equipment from the late M1 tier, we find Knight and Piranha to be the best kit combination. Knight contains Ricochet M1, Viking M1, and Chainmail, while Piranha contains Shaft M1, Hornet M1, and Corrosion, all of which are high-tier for the M1 range. Firewall, a popular early M2 kit, will not be selected. Let's analyze the rationale behind the kit choice:
Reasons to not use Firewall
- With the summer 2023 update, Vulcan was introduced, and some kits had their paints reassigned. For example, the Ram kit, a popular early-mid M2 choice, had its Hohloma paint (providing 30% Ricochet protection) replaced with Rhino, which does not offer Ricochet protection. As a result, Ricochet M1 becomes more powerful in early to mid M2
- Some players may fail to obtain Hohloma from Ram but realize the importance of Ricochet, prompting them to go for the Boar kit with Ricochet M2 and Spark containing 30% Firebird protection making Firebird less effective.
- Shaft M1 is a powerful turret for long-ranged battles. Its sniping damage can destroy Hunter M2 with 1 shot. However, it cannot destroy Viking M1 in 1 shot. This makes Viking M1 more effective than Hunter M2 in defending against Shaft M1.
- While Firewall may excel on certain small maps like Island, its hull proves ineffective on larger maps where Shaft performs optimally. In medium-sized maps, users equipped with Ricochet outperform those equipped with Firebird.
- The Hohloma paint that comes with Firewall contains significant protections, yet they interfere with the paint synergy of Spark + Rustle in M2. Both of these paints contain an overlapping protection that is superior to that in Hohloma, making Firewall a less desirable kit in M2 due to its hull and paint choices.
- Hornet provides a great synergy with Shaft, due to its high mobility and ability to snipe down enemies from afar. This makes Piranha a good kit to purchase in M1.
Paint Analysis

A product kit consists of a turret, a hull, and a paint. To fully evaluate the value of the kit, we must also consider the paint’s impact. Luckily for us, Chainmail and Corrosion contain much needed value; in fact, it can be said that Corrosion is one of the best M1 paints! But to begin, let’s consider Chainmail.
With Mjolnir and Anvil kits being popular implies the introduction of Hammer spam, where literally half of all players use Hammer in a small map. Nominally it is bad for us: Hammer has very high burst damage. But Chainmail and Viking completely nullify the presence of Hammer. Consider this:
- Hammer M1 has a maximum damage of 75.6 per shot
- Viking M1 has 244
- Meaning that it takes 244/75.6 = 3.22 ~ 4 shots to destroy Viking M1!
- By applying Chainmail, we get an additional 22% protection against Hammer. So the equation becomes 244/(75.6*0.78) = 4.13 ~ 5 full shots needed!

With Hammer out of the way, why not see how Corrosion performs? It has the following protections:
- Railgun: 10%
- Thunder: 15%
- Shaft: 15%
So Corrosion fares well in long-ranged battles and large maps. Take a look at the turret interactions:
| Turret | Paint VS Turret Level | Shots to Kill Hornet M1 | Shots to Kill Viking M1 |
|---|---|---|---|
| Thunder | None VS M1, Corrosion VS M2 | 3 | 4 |
| None VS M2 | 2 | 3 | |
| Corrosion VS M1 | 3 | 5 | |
| Railgun | None VS M1, Chainmail VS M1, Corrosion VS M1 | 2 | 3 |
| None VS M2, Chainmail VS M2, Corrosion VS M2 | 2 | 2 | |
| Shaft | None VS M1, Corrosion VS M1, Corrosion VS M2 | 1 | 1+1 |
| None VS M2 | 1 | 1 |
With Corrosion applied, Viking M1 no longer gets destroyed in a single shot by Shaft M2, while Viking can take one extra shot from both Thunder M1 and M2. (For Hornet, it can take one extra shot from Thunder M2) Truly the beast of all M1 paints.
Crystal Deficit
Be aware that acquiring both Knight and Piranha requires a significant amount of crystals, which may be difficult to afford. If are unable to afford both when reach Warrant Officer 1 (which is highly likely), it is recommended to purchase Knight first then Piranha at a later stage, as having a medium-ranged turret and medium hull is more versatile than having a long-ranged turret and light hull. However, from a cost perspective, purchasing both Knight and Piranha is still cheaper than purchasing Firewall, and the extra versatility from covering multiple turret and hull categories still gives benefit.
If wish to obtain more crystals before rank up, may follow the guide on crystal farming.
Kit Progression for M2
Considering that late-M2 equipment performs just as well as its M3 counterparts with earlier unlock ranks and lower costs, our priority should be to purchase as many of them as possible. Like our M0 and M1 kit choices, we aim to obtain the highest-tier turrets in the M2 subclass, but with a different rationale behind this progression. This means acquiring three of the following turrets, listed by tier:
- Turrets: Freeze, Thunder, Ricochet, Shaft
- Hulls: Dictator, Hornet, Mammoth, Viking
And thus the recommended progression for M2 is:
Avalanche, Boar, Fortress
Equipment Overview
|
|
|
Reasons to not use Shaft and Viking
While can obtain Shaft M2 from kit purchases by selecting the Cyclops kit available at the Captain rank, it's not the most efficient choice. Alternatively, could go for the Chiropractor kit, but that's not recommended either. The issue with Cyclops lies in its poor synergy with other kits, making it an unlikely choice for us. Here's why:
- Choosing Mammoth from Cyclops means missing out on Rustle from Fortress, which leaves at a disadvantage against most Thunder M2 players. There's no other way to obtain Rustle except from Fortress, as the Firebolt kit offers lower-tier equipment.
- If we forced Cyclops into our progression, we would meet the requirement for a long-range turret, eliminating the need to acquire either Digital or Winter from Hornet kits. Consequently, 'd be left with Tornado and Fireworks kits from Hornet, which are low-tier turrets with conflicting characteristics. Additionally, unlocking Spark from the two Hornet kits would prevent us from purchasing 'Boar,' which unlocks Ricochet. This is because we would already own Mammoth, and we couldn’t choose 'Goalkeeper'. However, it is possible to obtain Shaft M2 from separate purchases, and this will be explained below.
We deliver sad news to all Viking enjoyers: Viking M2 also doesn't align with our kit progression, and we will not purchase it separately. Here's why:

- There are four kits in the Captain rank offering Viking M2: DJ, Annihilator, Ice, and Vesuvius. Since Vulcan and Hammer M2 are lower-tier options, we're left with only two choices: DJ (Freeze + Electra) and Annihilator (Thunder + Atom).
- Acquiring Freeze from DJ means losing access to the Hornet kits, which contain anti-sniping paints. While Sandstone could be a viable option, Viking M2 outperforms Dictator M2 in nearly every aspect (except catching golds), making Simoom and every Dictator kit less desirable. Cyclops's Blacksmith paint becomes your only remaining option for protection. Additionally, with no high-tier Hornet M2 kits available, you can't access Thunder, Ricochet, Hornet, or Spark.
- Acquiring Thunder from Annihilator means forfeiting the Fortress kit and its high Thunder protection. Consequently, you'd have to purchase the Avalanche kit as an alternative, which contains Freeze, Hornet, and Winter. You could choose the Goalkeeper kit to unlock Ricochet and Mammoth, but this eliminates any chance of obtaining Spark, as the alternative choice, Boar's Dictator M2, is weaker than Viking and not commonly used in battle. Plus, there wouldn't be a valid way to obtain Mammoth M2 if Boar were purchased.
You can purchase Viking M2 separately at the Lieutenant Colonel rank, but Hunter M3 also begins unlocking in kits at that rank. Hunter M3 outclasses Viking M2 as an optimal early-M3 upgrade, offering significant speed improvements and comparable to Viking M2, making it just as effective against other turrets. Moreover, by going full-garage in M3, Viking M3 is unlocked through a kit; this makes separately purchasing Viking M2 not worth it due to the extra cost.
By choosing Viking M2, miss out on Dictator M2, which is part of the highly recommended Boar kit. Additionally, the paints obtained from the Hornet kits alone contain multiple overlaps and cannot create a perfect synergy, unlike our recommended combination.
Avalanche VS Stinger
The debate between Avalanche and Stinger is intense, with strong arguments supporting each kit. owever, when considering the progression of both turrets and paints into M3, Avalanche is the better option. Despite this, some players still prefer Stinger, and replacing Avalanche with it is a valid choice. Below are some arguments for each of the kits:
Arguments in Favor of Avalanche
- Freeze is at a higher tier than Isida. Since Isida M3 will be purchased from a kit, can choose from a wider range of turrets at or near M3 strength simultaneously.
- Winter provides excellent Shaft protection and good Thunder protection, both of which are essential in large battles. It can also be used as a direct M3 paint.
- Smoky M2 is a weak turret, and obtaining Smoky protection in M2 is unnecessary.
- Shaft is more powerful and harder to defend against than Railgun. Since Shaft M2 isn't available for purchase until Lieutenant Colonel, must manually equip Shaft protection.
- Thanks to Winter's high Shaft protection, won't need to purchase a kit with Picasso—only one with Prodigi, which can be obtained through the Touche kit.
Arguments in Favor of Stinger
- Stinger is more cost-effective than Avalanche.
- Stinger provides perfect paint synergy with no conflicts. By including Chainmail from the Knight kit or purchasing Sakura paint separately, can cover nearly all turrets with adequate protection, except for Vulcan when using Chainmail.
- Stinger helps defend against Smoky M3, which is overwhelmingly strong against M2 equipment.
- Digital's relatively low Shaft protection can be compensated by purchasing a kit with Picasso.
Understanding the Boar + Fortress combination
Purchasing the Boar kit grants access to Ricochet M2, a high-tier turret commonly considered overpowered. Due to the summer update mentioned in the M1 section, the availability of Hohloma (with Ricochet protection) has significantly decreased, making Ricochet more effective in battle. Although Dictator M2 is slower and harder to handle than Viking M2, it still performs well in battles.
The Fortress kit provides Thunder M2, Mammoth M2, and Rustle paint, all highly sought after for various reasons:
- Thunder is a higher-tier turret that deals more damage than Smoky M2 and includes large splash damage. It also synergizes well with all three unlocked hulls, each supporting a different yet efficient playstyle.
- Mammoth is a higher-tier hull with more than Titan M2, albeit at a slightly slower speed, which is insignificantly affected. Additionally, can mount it on Ricochet, another high-tier turret with decent range.
- Rustle is an excellent solution against enemy Thunders, given Thunder's popularity in large battles. It also reduces the effectiveness of the enemy Freeze and Isida combination, commonly seen in small battles.
Shaft M2

Shaft M2 is arguably the best M2 turret due to its tier but also its proximity to the M3 counterpart, making it possible to use effectively in battles up until Lieutenant General, where Railgun M3 starts dominating. You can always separately purchase Shaft M2 once you reach the Lieutenant Colonel rank, s Shaft M1 should have already been unlocked through the Piranha kit. It is also highly recommended to do so in order for you to diversify your turret choices against protection paints, with the only exception being the early purchase of the Touche kit in the Brigadier rank
However, unlike Shaft M1, Shaft M2 cannot destroy Hunter M3 in one shot, making it relatively weaker than the M1 version. Still, having a long-range turret along with Freeze, Ricochet, and Thunder M2 provides a significant advantage to the player."
Kit Progression for M3
Full Garage
With the rebalancing of all M3 upgrades, lower-tier equipment such as Smoky and Hunter M3 receive significant stat buffs, making them optimal choices for upgrading. Unlike previous strategies that focused on high-tier equipment, this approach involves purchasing all low-tier equipment early in the M3 ranks, providing a wide variety of turrets and hulls for use.
There are 11 turrets: 3 low-tier, 4 mid-tier, and 4 high-tier. Owning three of the four high-tier M2 turrets (Freeze, Thunder, and Ricochet—or all four if you purchase Shaft M2) allows for direct M3 upgrades from the garage. However, the benefits of upgrading them are not worth the high cost. To maximize the M3 garage, all seven turrets can be acquired from product kits, which also includes the seven M3 hulls. This eliminates the need to evaluate the optimality of each hull upgrade. This also justifies the decision to purchase only three M2 hulls, as additional hulls are unnecessary and would only waste crystals.
Equipment Overview
|
|
Hail

Smoky M3, receiving a 53% nominal increase in damage, becomes extremely dominant in medium and large battles during the early M3 ranks. With such a large increase in damage, it is not difficult to imagine everyone using it in battle, and that exactly describes the phenomenon. To take advantage of Smoky’s overwhelming firepower while staying protected against enemy Smokies, the Hail kit—containing Smoky M3, Hunter M3, and Needle—is the optimal choice.
Apart from being highly cost-effective, the Needle paint boasts two main advantages:
- 50% primary protection against enemy Smokies significantly reduces their firepower against you.
- 28% secondary protection against Shaft prevents Shaft M2 players from destroying Hunter M3 in one snipe and 1 arcade shot.
Pyromancer
With Winter and its high Shaft protection, purchasing Picasso or Jade is not required, and thus Cardinal is not an option. Since Smoky M3 is already owned from the Hail kit and Ricochet M3 is not an option, Pyromancer becomes the logical choice.
- Firebird M3 is an underrated turret that receives significant buffs from its M2 counterpart, making it an ideal upgrade.
- Inferno is the best paint for close-range Control Point (CP) battles in Arena and Garden, as it simultaneously defends against three short-range turrets (Firebird, Freeze, and Twins) with the highest instantaneous damage in the game.
Ant + Legend VS Touche + Healer
| Order | Ant + Legend | Touche + Healer |
|---|---|---|
| 1 | 
|
|
| 2 | 
|
|
As part of the kit progression, you will need to purchase Isida, Railgun, Wasp, Hornet, Irbis, and Prodigi. Note that Ant is identical to Healer, and Touche is identical to Legend, with the only difference being the swapped hull choices. They have identical discount rates, with the sole difference being that Ant is unlocked at Major General, while Touche is available at Brigadier. There are a few key distinctions:
- If you do not have enough crystals when Touche becomes available, go for Ant, then Legend. Since kits disappear within three ranks of their first availability, you risk missing out on earlier kits if you rank up too quickly while low on crystals. You may also purchase Ant if you want to play with Isida or if you purchased Shaft M2 separately, since it is a high-tier M2 that remains effective until Legend is unlocked.
- Otherwise, go for Touche and then Healer, as this allows you to use an additional M3 and diversify your turret choices. You also lack significant Railgun protection which Prodigi can provide.
Academician
Academician kit contains Hammer M3, Dictator M3, and the Nano paint. This combination is highly effective, as Dictator pairs well with turrets that have high recoil. However, for those aiming to complete their garage collection, acquiring every hull takes priority over specific combinations. Consider the statistics of Hammer and Nano instead:
- Hammer in M3 is extremely powerful: It has a clip recharge rate only slightly longer than the reloading speed between shots; this makes Hammer almost a continuous shooting turret. With its high impact force, Hammer can easily disrupt the aim of enemy turrets., and its M3 version can destroy Viking M3 in 3 shots and Hornet M3 in 2 shots.
- Nano M3 is a highly versatile and popular paint, offering strong protection against Hammer and Ricochet while also providing decent resistance to Smoky.It counteracts the damage boost Hammer received in its M3 upgrade, significantly reducing its effectiveness in combat.
Eyjafjallajokull VS Giant
As we enter the Mammoth M3 territory, we find two kits that fit well with our progression: One is named after the Icelandic volcano Eyjafjallajökull (which I’ll refer to as Ey for simplicity), and the other is Giant.
Since Giant includes Ricochet M3, which is a suboptimal upgrade, many players may instinctively prefer Ey includes Vulcan, a mid-tier turret, as well as Africa, a versatile and popular paint similar to Nano. However, Africa overlaps with Nano in Hammer protection while providing only 30% protection against Vulcan. It also offers 25% protection against Twins and Thunder, which can be significantly improved by purchasing Emerald (See section below).
For this reason, obtaining Giant and opting for Emerald may be a more sensible choice. Giant includes the Graffiti paint, which offers 50% protection against Vulcan and 25% against Twins and Shaft. However, it's important to note that there is an overlap in protection functionality between the 35% in Emerald and the 25% in Graffiti (similar to the overlap between Nano and Africa for Hammer, but to a greater extent). Additionally, purchasing Giant does not significantly contribute to completing a full garage, as Vulcan remains at M0 and requires manual upgrades.
Master of the Taiga

This kit serves as a filler option, allowing players to unlock Twins M3 and Viking M3 directly while skipping the costly Viking M2. There aren’t many reasons to prefer this kit, but it does provide a well-balanced combination with the rest of our equipment.
The paint itself doesn’t fare badly and remains useful in small- to medium-sized battles, though it is less popular compared to other unlocked paints such as Irbis or Inferno. However, it is still a good addition to our paint collection.
Some might prefer to purchase Jackhammer for the Tiger paint, which provides 47% primary protection against Hammer, and replace Academician and Ey with Thunderer and Destroyer. While it may offer better protection against Hammer, it ultimately lacks proper synergy, as Zeus, Inferno, Irbis, and Lumberjack have conflicting protections. As a result, this option is not included in the guide.
Supplementary Equipment
You should focus on saving crystals for the early M3 kits and always purchase them in the order they are unlocked, as they become unavailable after two rank-ups. You can always purchase high-tier turrets separately once you reach higher ranks beyond Marshal. Before that, you’ll mainly focus on buying kits and will level up quickly enough to reach the ranks required to purchase turrets separately.
The approach to paints is different. There is little substantial protection against Twins, which can be a major issue in battles where supplies are used. You should get Rock paint as early as possible since it is available at a lower rank and is highly effective against Twins. Additionally, Rock paint complements Africa paint, as they provide different levels of protection. Use Rock when facing multiple Twins opponents and Africa when dealing with just one. However, if you find Rustle ineffective for Thunder protection alone (since it also provides protection against Freeze and Isida), or if you already have too many paints with Isida protection, making Rock paint’s 28% Isida protection redundant, you might consider getting Emerald paint instead.
Summary
In ProTanki, upgrading equipment is crucial for battling tougher opponents as you rank up. Purchasing full equipment sets from kits has advantages over buying items separately, such as early access, consistent discounts, and the ability to skip lower-tier versions. However, kits may include unwanted items, so we must carefully select those that provide the greatest benefits.
To determine the best kit progression, we prioritize stat boosts. High-tier equipment is the main focus for M0-M2, but for M3, the emphasis shifts to low-tier options. The best strategy is to buy only high-tier equipment for M0-M2 through kits, then expand the garage by getting all seven kits with low- and mid-tier turrets, and finally fill protection gaps with paints not included in the kits.
- M0: Purchase Commando
- M1: Purchase Knight and Piranha
- M2: Purchase Avalanche/Stinger, Boar and Fortress. Also consider purchasing Shaft M2 separately
- M3: Too complicated to summarize here, read the section here
Alternate Kit Progression for M1
One problem with the original kit progression is that Hornet M1 is rarely used since its low health makes it struggle against higher-ranked opponents, forcing the player to rely almost entirely on Viking as the only viable hull. Shaft has its own drawbacks—it is only effective on large maps such as Madness. As a result, Ricochet becomes the only viable option for medium-sized maps.
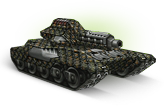
Instead of picking Knight and Piranha, we can obtain Die Hard and Matrix, which provide access to Mammoth M1 and Viking M1. These hulls have high durability and can hold their own against their M2 counterparts, Titan and Hunter. Ricochet and Thunder provide more turret variety for medium-sized maps like Polygon, while at least one of them remains effective across both small and large maps.
The protections that Cedar and Pixel offer are better than those of Chainmail and Corrosion, with the exception of Railgun and Shaft—neither of which are major threats since Viking can withstand two Railgun M1 shots and a fully charged Shaft M1 shot even without protection. Corrosion is essentially an inferior version of a Premium paint, suited only for large battles, whereas Cedar and Pixel offer useful protection in specific scenarios.
| Protection Comparison Table | ||
|---|---|---|
| Turret | Chainmail + Corrosion | Cedar + Pixel |
| 0 | ||
| 0 | ||
| Chainmail: 11 | Cedar: 8 | |
| Chainmail: 22 | Pixel: 30 | |
| 0 | ||
| 0 | ||
| 0 | Pixel: 16 | |
| Corrosion: 15 | Cedar: 30 | |
| 0 | ||
| Corrosion: 10 | 0 | |
| Corrosion: 15 | 0 | |
Alternate Kit Progression for M2
Many players complain about the long gap between purchasing their last M1 and first M2 kits. Using the same M1 equipment repeatedly is not only boring but also players at a disadvantage against early M2 kits. Therefore, by taking the Firebolt kit, both of these problems can be mitigated.
At first glance, Firebolt may seem like a poor choice since it contains both Firebird M2 and Wasp M2, which are generally considered less optimal.However, Firebird and Wasp can serve as early alternatives to Freeze and Hornet in Avalanche, allowing us to bypass purchasing them. In the original kit progression, Freeze M2 is ineffective at higher M2 ranks since Dictator and Freeze are a notoriously weak combination. Pairing Firebird with Viking M1, and later Dictator M2, makes it easier to use a melee turret effectively in early M2.
Firebolt’s paint, Rustle, also helps us meet the Spark+Rustle requirement, eliminating the need to purchase Fortress. This allows us to opt for the Cyclops kit instead, which includes Shaft M2. Thunder M2 can be separately purchased at Captain Rank alongside Cyclops.

By choosing Cyclops, we obtain Blacksmith, which has much better protection synergy against all long-range weapons compared to Graffiti (which lacks Railgun protection). It remains highly popular in M3 and continues to be useful as rank up. Additionally, having Blacksmith removes the need for Winter, which has redundant Thunder protection.
| Ranged Turrets Protection Comparison Table | ||
|---|---|---|
| Turret | Blacksmith | Graffiti |
| 40 | 50 | |
| 18 | 0 | |
| 26 | 25 | |
Alternate Kit Progression for M3
With Firebird M2 unlocked we can directly purchase its M3 version from the garage instead of purchasing Pyromancer (as both Firebird M3 and Pyromancer unlocks at Brigadier), which allows us to invest in Cardinal containing Twins M3 and the Picasso paint (which complements well with Blacksmith as one protects against Thunder and the other against Vulcan).
With us not having Freeze at all we need to purchase it from a kit. Luckily for us, by obtaining Twins M3 we are not forced to take the Twins and Viking M3 kit, which gives us a wider variety of options. Unfortunately Freeze M3 only comes in Boreas and Fridge, in which both paints are relatively bad, as Taiga is too similar to Spark, while Hive's protection combination does not synergize well in most maps other than medium-sized ones like Polygon.
One option is to swap out Touche for Stonecutter and then supplement in Boreas, obtaining Jade instead of Prodigi. This gives a boost to Shaft protection but removes any decent Railgun protection capping the max at 27%. However, Prodigi can be purchased separately at General, while Jade can only be unlocked at Generalissimo. The other option is to directly take Fridge kit with Hive which swaps out Taiga from the Twins Viking kit.
One problem with substituting Pyromancer out is that we no longer obtain Inferno early on, which gives protections against both Firebird and Freeze. To mitigate this, we can still separately purchase Zeus at Major General as supplementary equipment, even though it gives way less protection against Freeze. Still, this alternate kit progression might just be a little bit less desirable in terms of paint synergy.
| Protection Comparison Table | ||
|---|---|---|
| Turret | Normal Progression | Alternate Progression |
| Inferno: 36 | Spark: 30 | |
| Inferno: 50 | Rustle: 30 | |
| Irbis: 50 | ||
| Nano: 35 | ||
| Africa: 25 | ||
| Spark: 42 | ||
| Needle: 50 | ||
| Rustle: 40 | ||
| Africa: 30 | Hive: 42 | |
| Prodigi: 50 | ||
| Winter: 45 | Picasso: 33 | |