Thunder: Difference between revisions
Jump to navigation
Jump to search
(((ME))) |
(→Table of characteristics: Updated ((ME))) |
||
| Line 5: | Line 5: | ||
This second generation middle-caliber gun is the best choice for dynamic battle. Splash damage (make sure you don't hit yourself!) allows you to attack a group of enemy vehicles. Quick recharge will give you a distinct advantage over heavy tanks of enemy. Equipped with light armor Thunder is one of the most dangerous weapons on the battlefield. | This second generation middle-caliber gun is the best choice for dynamic battle. Splash damage (make sure you don't hit yourself!) allows you to attack a group of enemy vehicles. Quick recharge will give you a distinct advantage over heavy tanks of enemy. Equipped with light armor Thunder is one of the most dangerous weapons on the battlefield. | ||
==Table of | == Table of Characteristics == | ||
{|class="wikitable" style=" | {| class="wikitable" style="margin:auto" | ||
!Modification | !Modification | ||
!M0 | !M0 | ||
| Line 13: | Line 13: | ||
!M3 | !M3 | ||
|- | |- | ||
|Available from | |style="text-align:left;"|'''Available from rank''' | ||
| | |{{Rank/05|size=normal}} | ||
| | |{{Rank/12|size=normal}} | ||
| | |{{Rank/19|size=normal}} | ||
| | |{{Rank/27|size=normal}} | ||
|- | |- | ||
|- | |style="text-align:left;"|'''View from Garage''' | ||
|View | |||
|[[File:Turret_thunder_m0.png|center|link=]] | |[[File:Turret_thunder_m0.png|center|link=]] | ||
|[[File:Thunder1.png|center|link=]] | |[[File:Thunder1.png|center|link=]] | ||
| Line 26: | Line 25: | ||
|[[File:Thunder3.png|center|link=]] | |[[File:Thunder3.png|center|link=]] | ||
|- | |- | ||
|style="text-align:left;"| | |style="text-align:left;"|'''Price''' | ||
|1 450 | |{{price|1 450}} | ||
|28 100 | |{{price|28 100}} | ||
|97 000 | |{{price|97 000}} | ||
|242 500 | |{{price|242 500}} | ||
|- | |||
| colspan="5" |<b>Upgradable Parameters</b> | |||
|- | |- | ||
|style="text-align:left;"|[[File:MinMax dmg.png|link=HUD#Turrets]] | |style="text-align:left;"|'''[[File:MinMax dmg.png|link=HUD#Turrets]] Minimum Damage''' {{Hint|Minimum damage dealt per turret shot.}} | ||
|42 | |42 | ||
|55 | |55 | ||
| Line 38: | Line 39: | ||
|78 | |78 | ||
|- | |- | ||
|style="text-align:left;"|[[File:MinMax dmg.png|link=HUD#Turrets]] | |style="text-align:left;"|'''[[File:MinMax dmg.png|link=HUD#Turrets]] Maximum Damage''' {{Hint|Maximum damage dealt per turret shot.}} | ||
|68 | |68 | ||
|83 | |83 | ||
| Line 44: | Line 45: | ||
|110 | |110 | ||
|- | |- | ||
|style="text-align:left;"|[[File: | |style="text-align:left;"|'''[[File:Impact force.png|link=HUD#Turrets]] Impact force''' {{Hint|The physical force applied to an enemy tank upon impact, causing displacement.}} | ||
|169.3 | |169.3 | ||
|217.4 | |217.4 | ||
|265.6 | |265.6 | ||
|300 | |300.0 | ||
|- | |- | ||
|style="text-align:left;"| | |style="text-align:left;"|'''Splash impact force''' {{Hint|The physical force applied to tanks within the blast radius, causing displacement.}} | ||
|338.58 | |338.58 | ||
|434.89 | |434.89 | ||
| Line 62: | Line 57: | ||
|600.00 | |600.00 | ||
|- | |- | ||
|style="text-align:left;"| | |style="text-align:left;"|'''Recoil''' {{Hint|The physical force affecting the turret's own tank when firing.}} | ||
|138.82 | |138.82 | ||
|187.35 | |187.35 | ||
| Line 68: | Line 63: | ||
|227.06 | |227.06 | ||
|- | |- | ||
|style="text-align:left;"|[[File:Turret Turning Speed (degrees-s).png|link=HUD#Turrets]] | |style="text-align:left;"|'''[[File:Reload time (s).png|link=HUD#Turrets]] Reload time (s)''' {{Hint|The pause between shots.}} | ||
|3.153 | |||
|2.912 | |||
|2.672 | |||
|2.500 | |||
|- | |||
|style="text-align:left;"|'''[[File:Turret Turning Speed (degrees-s).png|link=HUD#Turrets]] Turret rotation speed (°/s)''' {{Hint|The maximum speed at which the turret can rotate.}} | |||
|77.0 | |77.0 | ||
|94.6 | |94.6 | ||
| Line 74: | Line 75: | ||
|124.9 | |124.9 | ||
|- | |- | ||
|style="text-align:left;"| | |style="text-align:left;"|'''Turret rotation acceleration (°/s²)''' {{Hint|The acceleration at which the turret reaches its maximum rotation speed.}} | ||
|111.7 | |111.7 | ||
|129.7 | |129.7 | ||
| Line 80: | Line 81: | ||
|160.4 | |160.4 | ||
|- | |- | ||
|style="text-align:left;"|[[File:Range of min. damage.png|link=HUD#Turrets]] | |style="text-align:left;"|'''[[File:Range of min. damage.png|link=HUD#Turrets]] Minimum damage range (m)''' {{Hint|The range at which the turret deals minimum damage. If the target is beyond this range, no damage is dealt.}} | ||
|113.85 | |||
|123.49 | |||
|133.12 | |||
|140.00 | |||
|- | |||
|style="text-align:left;"|'''Maximum damage range (m)''' {{Hint|The range at which the turret deals full damage. Beyond this range, damage decreases linearly until reaching the minimum damage range.}} | |||
|56.93 | |56.93 | ||
|61.75 | |61.75 | ||
|66.56 | |66.56 | ||
|70. | |70.00 | ||
|- | |- | ||
| | | colspan="5" |<b>Non Upgradable Parameters</b> | ||
|- | |- | ||
|style="text-align:left;"| | |style="text-align:left;"|'''Weak damage percentage (%)''' {{Hint|The percentage of normal damage dealt at the minimum damage range.}} | ||
| | |50 | ||
|50 | |||
|50 | |||
|50 | |||
|- | |- | ||
|style="text-align:left;"| | |style="text-align:left;"|'''Maximum damage radius (m)''' {{Hint|The radius from the impact point where full damage is applied. Beyond this radius, damage decreases linearly to the minimum damage radius.}} | ||
| | |0 | ||
|0 | |||
|0 | |||
|0 | |||
|- | |- | ||
|style="text-align:left;"| | |style="text-align:left;"|'''Minimum damage radius (m)''' {{Hint|The radius from the impact point where minimum damage is applied. Beyond this radius, no damage is dealt.}} | ||
| | |12 | ||
|12 | |||
|12 | |||
|12 | |||
|- | |- | ||
|style="text-align:left;"| | |style="text-align:left;"|'''Weak damage percentage (splash) (%)''' {{Hint|The percentage of normal damage dealt at the minimum damage radius.}} | ||
| | |25 | ||
|25 | |||
|25 | |||
|25 | |||
|- | |- | ||
|style="text-align:left;"| | |style="text-align:left;"|'''Auto-aim angle upward (°)''' {{Hint|The auto-aim adjustment angle when targeting enemies above the turret's aiming plane.}} | ||
| | |9 | ||
|9 | |||
|9 | |||
|9 | |||
|- | |- | ||
|style="text-align:left;"| | |style="text-align:left;"|'''Auto-aim angle downward (°)''' {{Hint|The auto-aim adjustment angle when targeting enemies below the turret's aiming plane.}} | ||
| | |12 | ||
|12 | |||
|12 | |||
|12 | |||
|} | |} | ||
Revision as of 08:26, 26 February 2025
See also: Turrets, How to Use Thunder (Tips and Tricks)
See other variant: Thunder XT
Description in Garage
This second generation middle-caliber gun is the best choice for dynamic battle. Splash damage (make sure you don't hit yourself!) allows you to attack a group of enemy vehicles. Quick recharge will give you a distinct advantage over heavy tanks of enemy. Equipped with light armor Thunder is one of the most dangerous weapons on the battlefield.
Table of Characteristics
| Modification | M0 | M1 | M2 | M3 |
|---|---|---|---|---|
| Available from rank | 
|

|

|

|
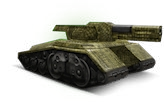
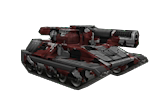
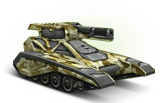
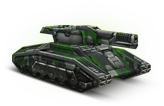
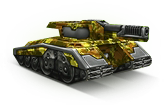
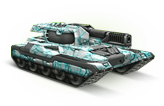
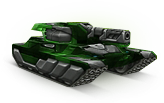
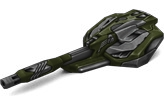
| View from Garage |  |
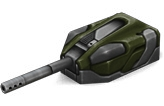
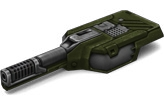
 |
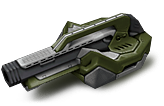
 |
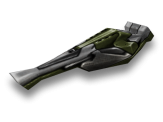
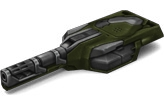 |
| Price | 1 450 |
28 100 |
97 000 |
242 500 |
| Upgradable Parameters | ||||
| 42 | 55 | 68 | 78 | |
| 68 | 83 | 99 | 110 | |
| 169.3 | 217.4 | 265.6 | 300.0 | |
| Splash impact force |
338.58 | 434.89 | 531.20 | 600.00 |
| Recoil |
138.82 | 187.35 | 209.41 | 227.06 |
| 3.153 | 2.912 | 2.672 | 2.500 | |
| 77.0 | 94.6 | 112.3 | 124.9 | |
| Turret rotation acceleration (°/s²) |
111.7 | 129.7 | 147.6 | 160.4 |
| 113.85 | 123.49 | 133.12 | 140.00 | |
| Maximum damage range (m) |
56.93 | 61.75 | 66.56 | 70.00 |
| Non Upgradable Parameters | ||||
| Weak damage percentage (%) |
50 | 50 | 50 | 50 |
| Maximum damage radius (m) |
0 | 0 | 0 | 0 |
| Minimum damage radius (m) |
12 | 12 | 12 | 12 |
| Weak damage percentage (splash) (%) |
25 | 25 | 25 | 25 |
| Auto-aim angle upward (°) |
9 | 9 | 9 | 9 |
| Auto-aim angle downward (°) |
12 | 12 | 12 | 12 |
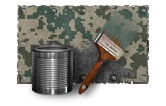
Protection Paints
The following Paints have protection ![]() against Thunder:
against Thunder:
| Vortex | Alien | Jaguar | Loam | Jade | Corrosion |
|---|---|---|---|---|---|

|

|

|

|

|

|
| 8% | 9% | 10% | 11% | 11% | 15% |
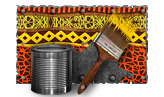
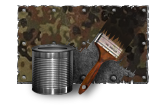
| Metallic | Clay | Picasso | Sandstone | Prodigi | Africa |

|

|

|
|
|
|
| 18% | 20% | 20% | 22% | 23% | 25% |
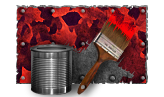
| Winter | Cherry | Cedar | Rustle | Emerald | |

|
|
|

|

|
|
| 26% | 28% | 30% | 40% | 50% |
Kits including Thunder
Thunder can be purchased from the following Product kits:
M0