Thunder: Difference between revisions
Jump to navigation
Jump to search


(((NA)) Created the thunder article) |
No edit summary |
||
| (28 intermediate revisions by 12 users not shown) | |||
| Line 1: | Line 1: | ||
''See also'': [[Turrets]], [[How to Use Thunder]] <br> | |||
''See other variant'': [[Thunder XT]] | |||
==Description in Garage== | ==Description in Garage== | ||
This second generation middle-caliber gun is the best choice for dynamic battle. Splash damage (make sure you don't hit yourself!) allows you to attack a group of enemy vehicles. Quick recharge will give you a distinct advantage over heavy tanks of enemy. Equipped with light armor Thunder is one of the most dangerous weapons on the battlefield. | This second generation middle-caliber gun is the best choice for dynamic battle. Splash damage (make sure you don't hit yourself!) allows you to attack a group of enemy vehicles. Quick recharge will give you a distinct advantage over heavy tanks of enemy. Equipped with light armor Thunder is one of the most dangerous weapons on the battlefield. | ||
==Table of | == Table of Characteristics == | ||
{ | {{Alert | ||
|type=warning | |||
|text='''Warning!''' The characteristics in this table may not entirely correspond to the current in-game stats due to the release of the recent [[Updates#01/03/2026|update]]. After voting, the characteristics here will either be updated to match the in-game ones or will instead remain the same. | |||
}} | |||
{| class="wikitable" style="margin:auto" | |||
| | !Modification | ||
!M0 | |||
!M1 | |||
!M2 | |||
!M3 | |||
|- | |||
|style="text-align:left;"|'''Available from rank''' | |||
|{{Rank/05|size=normal}} | |||
|{{Rank/12|size=normal}} | |||
|{{Rank/19|size=normal}} | |||
|{{Rank/27|size=normal}} | |||
|- | |||
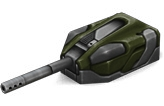
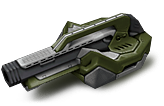
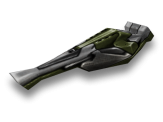
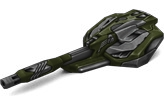
|style="text-align:left;"|'''View from Garage''' | |||
|[[File:Turret_thunder_m0.png|center|link=]] | |||
|[[File:Thunder1.png|center|link=]] | |||
|[[File:Thunder2.png|center|link=]] | |||
|[[File:Thunder3.png|center|link=]] | |||
|- | |||
|style="text-align:left;"|'''Price''' | |||
|{{price|1 450}} | |||
|{{price|28 100}} | |||
|{{price|97 000}} | |||
|{{price|242 500}} | |||
|- | |||
| colspan="5" |<b>Upgradable Parameters</b> | |||
|- | |||
|style="text-align:left;"|'''[[File:MinMax dmg.png|link=HUD#Turrets]] Minimum Damage''' {{Hint|Minimum damage dealt per turret shot.}} | |||
|42 | |||
|55 | |||
|68 | |||
|78 | |||
|- | |||
|style="text-align:left;"|'''[[File:MinMax dmg.png|link=HUD#Turrets]] Maximum Damage''' {{Hint|Maximum damage dealt per turret shot.}} | |||
|68 | |||
|83 | |||
|99 | |||
|110 | |||
|- | |||
|style="text-align:left;"|'''[[File:Impact force.png|link=HUD#Turrets]] Impact force''' {{Hint|The physical force applied to an enemy tank upon impact, causing displacement.}} | |||
|169.3 | |||
|217.4 | |||
|265.6 | |||
|300.0 | |||
|- | |||
|style="text-align:left;"|'''Splash impact force''' {{Hint|The physical force applied to tanks within the blast radius, causing displacement.}} | |||
|338.58 | |||
|434.89 | |||
|531.20 | |||
|600.00 | |||
|- | |||
|style="text-align:left;"|'''Recoil''' {{Hint|The physical force affecting the turret's own tank when firing.}} | |||
|138.82 | |||
|187.35 | |||
|209.41 | |||
|227.06 | |||
|- | |||
|style="text-align:left;"|'''[[File:Reload time (s).png|link=HUD#Turrets]] Reload time (s)''' {{Hint|The pause between shots.}} | |||
|3.153 | |||
|2.912 | |||
|2.672 | |||
|2.500 | |||
|- | |||
|style="text-align:left;"|'''[[File:Turret Turning Speed (degrees-s).png|link=HUD#Turrets]] Turret rotation speed (°/s)''' {{Hint|The maximum speed at which the turret can rotate.}} | |||
|77.0 | |||
|94.6 | |||
|112.3 | |||
|124.9 | |||
|- | |||
|style="text-align:left;"|'''Turret rotation acceleration (°/s²)''' {{Hint|The acceleration at which the turret reaches its maximum rotation speed.}} | |||
|111.7 | |||
|129.7 | |||
|147.6 | |||
|160.4 | |||
|- | |||
|style="text-align:left;"|'''[[File:Range of min. damage.png|link=HUD#Turrets]] Minimum damage range (m)''' {{Hint|The range at which the turret deals minimum damage. If the target is beyond this range, no damage is dealt.}} | |||
|113.85 | |||
|123.49 | |||
|133.12 | |||
|140.00 | |||
|- | |||
|style="text-align:left;"|'''Maximum damage range (m)''' {{Hint|The range at which the turret deals full damage. Beyond this range, damage decreases linearly until reaching the minimum damage range.}} | |||
|56.93 | |||
|61.75 | |||
|66.56 | |||
|70.00 | |||
|- | |||
| colspan="5" |<b>Non Upgradable Parameters</b> | |||
|- | |||
|style="text-align:left;"|'''Weak damage percentage (%)''' {{Hint|The percentage of normal damage dealt at the minimum damage range.}} | |||
|50 | |||
|50 | |||
|50 | |||
|50 | |||
|- | |||
|style="text-align:left;"|'''Maximum damage radius (m)''' {{Hint|The radius from the impact point where full damage is applied. Beyond this radius, damage decreases linearly to the minimum damage radius.}} | |||
|0 | |||
|0 | |||
|0 | |||
|0 | |||
|- | |||
|style="text-align:left;"|'''Minimum damage radius (m)''' {{Hint|The radius from the impact point where minimum damage is applied. Beyond this radius, no damage is dealt.}} | |||
|12 | |||
|12 | |||
|12 | |||
|12 | |||
|- | |||
|style="text-align:left;"|'''Weak damage percentage (splash) (%)''' {{Hint|The percentage of normal damage dealt at the minimum damage radius.}} | |||
|25 | |||
|25 | |||
|25 | |||
|25 | |||
|- | |||
|style="text-align:left;"|'''Auto-aim angle upward (°)''' {{Hint|The auto-aim adjustment angle when targeting enemies above the turret's aiming plane.}} | |||
|9 | |||
|9 | |||
|9 | |||
|9 | |||
|- | |||
|style="text-align:left;"|'''Auto-aim angle downward (°)''' {{Hint|The auto-aim adjustment angle when targeting enemies below the turret's aiming plane.}} | |||
|12 | |||
|12 | |||
|12 | |||
|12 | |||
|} | |||
==Protection Paints== | |||
The following [[Paints]] have protection [[File:Thunder.png|link=HUD#Damage_Types]] against Thunder: | |||
<div style="overflow-x: auto"> | |||
{| class="wikitable" style="margin:auto;text-align:center;" | |||
![[Vortex]] | |||
![[Alien]] | |||
![[Jaguar]] | |||
![[Loam]] | |||
![[Jade]] | |||
![[Corrosion]] | |||
|- | |||
|[[File:Vortex Paint.png|link=]] | |||
|[[File:Coloring alien.png|link=]] | |||
|[[File:Coloring jaguar.png|link=]] | |||
|[[File:Coloring loam.png|link=]] | |||
|[[File:Coloring jade.png|link=]] | |||
|[[File:Coloring corrosion.png|link=]] | |||
|- | |||
|8% | |||
|9% | |||
|10% | |||
|11% | |||
|11% | |||
|15% | |||
|- | |||
![[Metallic]] | |||
![[Mirage]] | |||
![[Clay]] | |||
![[Picasso]] | |||
![[Sandstone]] | |||
![[Prodigi]] | |||
|- | |||
|[[File:Metallic Paint.png|link=]] | |||
|[[File:Coloring_mirage.png|link=]] | |||
|[[File:Coloring clay.png|link=]] | |||
|[[File:Coloring picasso.png|link=]] | |||
|[[File:Coloring sandstone.png|link=]] | |||
|[[File:Coloring prodigi.png|link=]] | |||
|- | |||
|18% | |||
|20% | |||
|20% | |||
|20% | |||
|22% | |||
|23% | |||
|- | |||
![[Africa]] | |||
![[Winter]] | |||
![[Cherry]] | |||
![[Cedar]] | |||
![[Rustle]] | |||
![[Emerald]] | |||
|- | |||
|[[File:Africa Paint.png|link=]] | |||
|[[File:Coloring winter.png|link=]] | |||
|[[File:Cherry Paint.png|link=]] | |||
|[[File:Coloring cedar.png|link=]] | |||
|[[File:Coloring rustle.png|link=]] | |||
|[[File:Coloring emerald.png|link=]] | |||
|- | |||
|25% | |||
|26% | |||
|28% | |||
|40% | |||
|30% | |||
|50% | |||
|} | |||
</div> | |||
==Kits including Thunder== | |||
Thunder can be purchased from the following [[Product kits]]: | |||
<center> | |||
===M0=== | |||
<div style="display: flex; flex-wrap: wrap; justify-content:center; gap: 25px;"> | |||
{{KitCard | |||
|name=Collector | |||
|preview=Collector.png | |||
|price={{price|4 440}} | |||
|from={{Rank/07}} | |||
|to={{Rank/09}} | |||
|hull=All M0 [[Turrets]] (except [[Smoky]]) | |||
|turret=— | |||
|paint=— | |||
|discount=60% | |||
}} | |||
{{KitCard | |||
|name=Full Load | |||
|preview=FullLoad.png | |||
|price={{price|4 830}} | |||
|from={{Rank/07}} | |||
|to={{Rank/09}} | |||
|hull=All M0 [[Turrets]] (except [[Smoky]]). | |||
|turret=All M0 [[Hulls]] (except [[Hunter]]) | |||
|paint=— | |||
|discount=65% | |||
}} | |||
{{KitCard | |||
|name=Horn | |||
|preview=Horn.png | |||
|price={{price|1 777}} | |||
|from={{Rank/05}} | |||
|to={{Rank/07}} | |||
|turret=[[Thunder]] M0 | |||
|hull=[[Dictator]] M0 | |||
|paint=[[Metallic]] | |||
|discount=55% | |||
}} | |||
{{KitCard | |||
|name=Grizzly | |||
|preview=Grizzly.png | |||
|price={{price|1 700}} | |||
|from={{Rank/05}} | |||
|to={{Rank/07}} | |||
|turret=[[Thunder]] M0 | |||
|hull=[[Mammoth]] M0 | |||
|paint=[[Forester]] | |||
|discount=50% | |||
}} | |||
</div> | |||
===M1=== | |||
<div style="display: flex; flex-wrap: wrap; justify-content:center; gap: 25px;"> | |||
{{KitCard | |||
|name=Nutcracker | |||
|preview=Nutcracker.png | |||
|price={{price|41 332}} | |||
|from={{Rank/12}} | |||
|to={{Rank/14}} | |||
|turret=[[Thunder]] M1 | |||
|hull=[[Dictator]] M1 | |||
|paint=[[Cedar]] | |||
|discount=45% | |||
}} | |||
{{KitCard | |||
|name=Destroyer | |||
|preview=Destroyer.png | |||
|price={{price|46 227}} | |||
|from={{Rank/12}} | |||
|to={{Rank/14}} | |||
|turret=[[Thunder]] M1 | |||
|hull=[[Mammoth]] M1 | |||
|paint=[[Pixel]] | |||
|discount=45% | |||
}} | |||
</div> | |||
===M2=== | |||
<div style="display: flex; flex-wrap: wrap; justify-content:center; gap: 25px;"> | |||
{{KitCard | |||
|name=Simoom | |||
|preview=Simoom.png | |||
|price={{price|160 352}} | |||
|from={{Rank/19}} | |||
|to={{Rank/21}} | |||
|turret=[[Thunder]] M2 | |||
|hull=[[Dictator]] M2 | |||
|paint=[[Sandstone]] | |||
|discount=45% | |||
}} | |||
{{KitCard | |||
|name=Oldtimer | |||
|preview=Oldtimer.png | |||
|price={{price|181 620}} | |||
|from={{Rank/19}} | |||
|to={{Rank/21}} | |||
|turret=[[Thunder]] M2 | |||
|hull=[[Viking]] M2 | |||
|paint=[[Rustle]] | |||
|discount=40% | |||
}} | |||
</div> | |||
===M3=== | |||
<div style="display: flex; flex-wrap: wrap; justify-content:center; gap: 25px;"> | |||
{{KitCard | |||
|name=Dozer | |||
|preview=Dozer.png | |||
|price={{price|433 440}} | |||
|from={{Rank/26}} | |||
|to={{Rank/28}} | |||
|turret=[[Thunder]] M3 | |||
|hull=[[Mammoth]] M3 | |||
|paint=[[Tiger]] | |||
|discount=40% | |||
}} | |||
{{KitCard | |||
|name=Raiden | |||
|preview=Raiden.png | |||
|price={{price|464 555}} | |||
|from={{Rank/26}} | |||
|to={{Rank/28}} | |||
|turret=[[Thunder]] M3 | |||
|hull=[[Viking]] M3 | |||
|paint=[[Emerald]] | |||
|discount=35% | |||
}} | |||
</div> | |||
</center> | |||
==Shot Effects== | |||
{{ShotEffect|Thunder}} | |||
== Turret Overview == | |||
{{TurretOverview}} | |||
[[Category:Gameplay]] | |||
Latest revision as of 20:40, 5 January 2026
See also: Turrets, How to Use Thunder
See other variant: Thunder XT
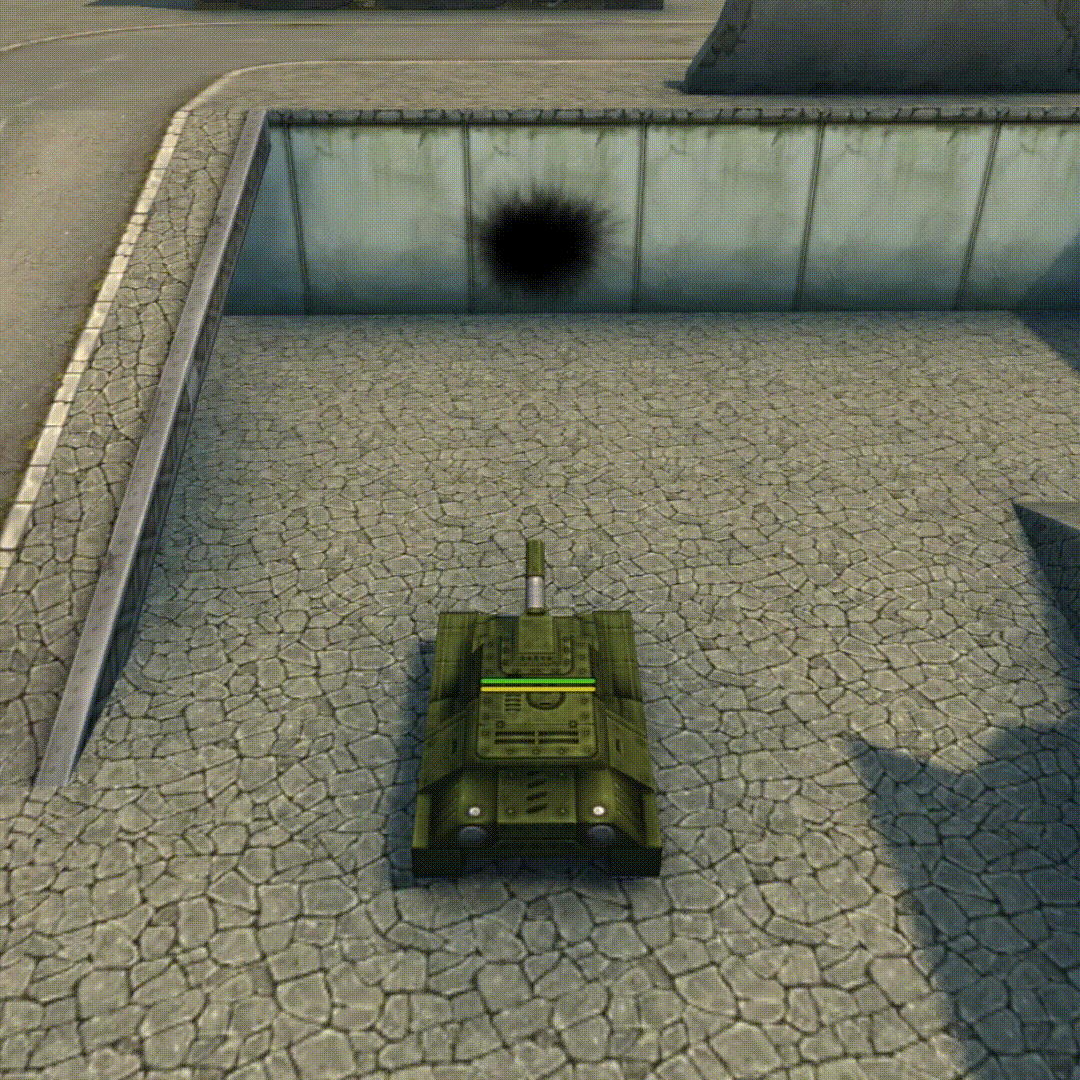
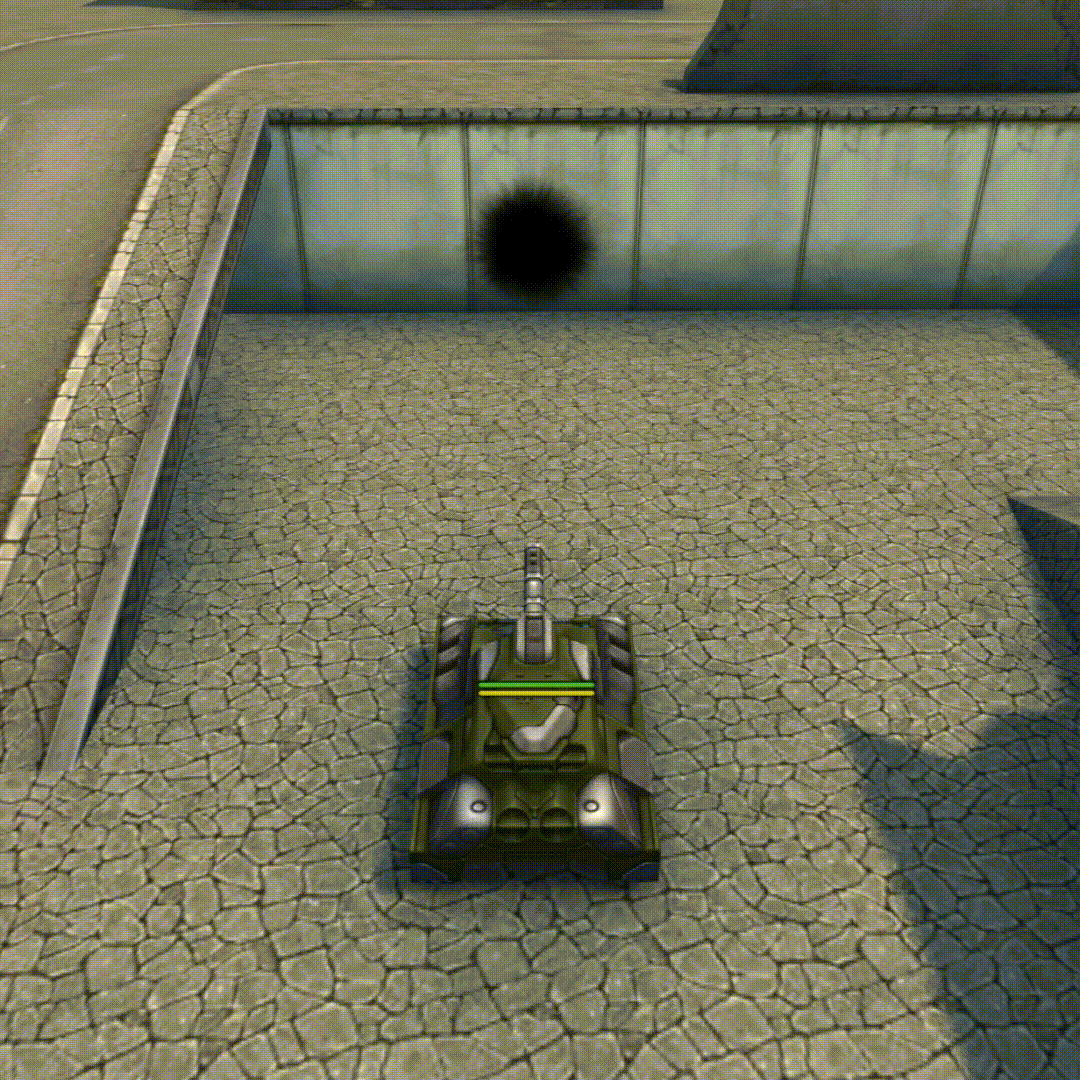
Description in Garage
This second generation middle-caliber gun is the best choice for dynamic battle. Splash damage (make sure you don't hit yourself!) allows you to attack a group of enemy vehicles. Quick recharge will give you a distinct advantage over heavy tanks of enemy. Equipped with light armor Thunder is one of the most dangerous weapons on the battlefield.
Table of Characteristics
Warning! The characteristics in this table may not entirely correspond to the current in-game stats due to the release of the recent update. After voting, the characteristics here will either be updated to match the in-game ones or will instead remain the same.
| Modification | M0 | M1 | M2 | M3 |
|---|---|---|---|---|
| Available from rank | 
|

|

|

|
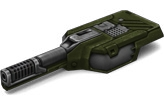
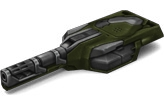
| View from Garage |  |
 |
 |
 |
| Price | 1 450 |
28 100 |
97 000 |
242 500 |
| Upgradable Parameters | ||||
| 42 | 55 | 68 | 78 | |
| 68 | 83 | 99 | 110 | |
| 169.3 | 217.4 | 265.6 | 300.0 | |
| Splash impact force |
338.58 | 434.89 | 531.20 | 600.00 |
| Recoil |
138.82 | 187.35 | 209.41 | 227.06 |
| 3.153 | 2.912 | 2.672 | 2.500 | |
| 77.0 | 94.6 | 112.3 | 124.9 | |
| Turret rotation acceleration (°/s²) |
111.7 | 129.7 | 147.6 | 160.4 |
| 113.85 | 123.49 | 133.12 | 140.00 | |
| Maximum damage range (m) |
56.93 | 61.75 | 66.56 | 70.00 |
| Non Upgradable Parameters | ||||
| Weak damage percentage (%) |
50 | 50 | 50 | 50 |
| Maximum damage radius (m) |
0 | 0 | 0 | 0 |
| Minimum damage radius (m) |
12 | 12 | 12 | 12 |
| Weak damage percentage (splash) (%) |
25 | 25 | 25 | 25 |
| Auto-aim angle upward (°) |
9 | 9 | 9 | 9 |
| Auto-aim angle downward (°) |
12 | 12 | 12 | 12 |
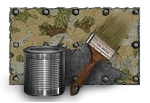
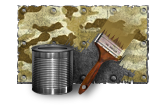
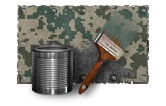
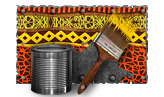
Protection Paints
The following Paints have protection ![]() against Thunder:
against Thunder:
| Vortex | Alien | Jaguar | Loam | Jade | Corrosion |
|---|---|---|---|---|---|

|

|

|

|

|

|
| 8% | 9% | 10% | 11% | 11% | 15% |
| Metallic | Mirage | Clay | Picasso | Sandstone | Prodigi |

|
|

|

|
|
|
| 18% | 20% | 20% | 20% | 22% | 23% |
| Africa | Winter | Cherry | Cedar | Rustle | Emerald |
|

|
|
|

|

|
| 25% | 26% | 28% | 40% | 30% | 50% |
Kits including Thunder
Thunder can be purchased from the following Product kits:
M0


M1


M2


M3


Shot Effects
M0
M1
M2
M3