ProTLVK: Difference between revisions
(Created page with "='''What stuff you can use in order to make the article!'''= <br> ==What is PTVLK?== <br> '''PTVLK''' is a program used by the helpers of the game and obviously the development team of ProTanki. PTVLK is designed to help developers test new features, game mechanics, and levels in a controlled and safe environment before they are released to the public. '''PTVLK''' allows developers to create custom game scenarios and test them under various conditions to ensure they f...") |
mNo edit summary |
||
| (23 intermediate revisions by 9 users not shown) | |||
| Line 1: | Line 1: | ||
=''' | [[File:ProTLVK Logo.png|link=|center]] | ||
'''ProTanki Level Viewer Kit''' ('''ProTLVK''') — a special tool that allows players to test different maps. | |||
Often used by map makers and [[Content_Creators| Content Creators]] for art. | |||
< | ==How to use it<span class="plainlinks">[https://imgur.com/a/8jMfnmm ?]</span>== | ||
The main panel is very similar to ProTanki. There are battles, garage, settings, sound, fullscreen mode and help buttons. There is also a rank and crystals panel, but these are mainly for decoration. | |||
[[File:ProTLVK button bar view.png|link=]] | |||
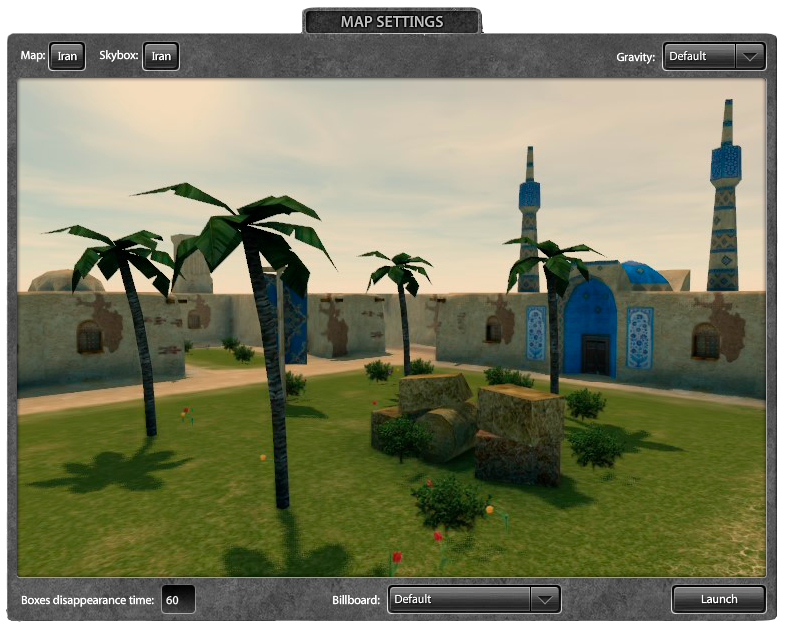
The | In the middle, there are map settings, where you can select a specific map, skybox, gravity and billboard. The disappearence time of boxes can also be adjusted here. | ||
[[File:ProTLVK map settings view.png|link=]] | |||
'''Setting up the map''' | |||
------------------------------ | |||
'''List of maps''' | |||
[[File:ProTLVK map list.png|link=]] | |||
*Maps are divided into 4 categories: summer, winter, holiday and test. | |||
*Test maps could appear on the main server. | |||
'''Skyboxes''' | |||
[[File:Screenshot_4.png|link=]] | |||
*By changing the skybox, the lighting on the map also changes. | |||
*Skyboxes have 4 categories similarly to maps. | |||
*Skyboxes with a number prefix at the end only differ in the direction of the shadows. | |||
'''Gravity''' | |||
*By clicking on the button, you can change the gravity of the map. | |||
* 5 types of gravity: Default, Space, Moon, Madness and Madness 2. | |||
'''Billboard''' | |||
*When you click on the button, you can select the billboard of any holiday. | |||
'''Launching the map''' | |||
*To start the map, press the "Launch" button. | |||
[[File:ProTLVK battle view.jpg|1058x1058px|link=]] | |||
Now you can do whatever you want: add tanks, gold boxes, and even more. | |||
==Controls== | |||
Main: | |||
{{Hotkey|Insert}} - add a tank. | |||
{{Hotkey|Delete}} - delete current tank. | |||
{{Hotkey|N}} - select next tank. | |||
{{Hotkey|Shift}} + {{Hotkey|N}} - select previous tank. | |||
{{Hotkey|Numpad 7}} / {{Hotkey|Numpad 9}} - change turret. | |||
{{Hotkey|Numpad 4}} / {{Hotkey|Numpad 6}} - change hull. | |||
{{Hotkey|Numpad 1}} / {{Hotkey|Numpad 3}} - change paint. | |||
{{Hotkey|[}} - select the previous weapon. | |||
{{Hotkey|]}} - select the following weapons. | |||
{{Hotkey|;}} - select the previous turret effect. | |||
{{Hotkey|'}} - select the following turret effect. | |||
{{Hotkey|1}} / {{Hotkey|2}} / {{Hotkey|3}} / {{Hotkey|4}} / {{Hotkey|5}} / {{Hotkey|6}} - drop a supply. | |||
{{Hotkey|F4}} - open the hull physics editor for the current tank. | |||
You can find all key bindings in the "Instruction.txt" file inside the archive. | |||
==Garage== | |||
Here you can see how the tank will look from different angles. | |||
[[File:Turretsgif.gif|link=]] [[File:Hullsgif.gif|link=]] [[File:Paintsgif.gif|link=]] | |||
[[File:ProTLVK garage view.png|1058x610px|link=]] | |||
'''Change view''' - makes the tank white and the garage black, so you can cut the tank with the alpha channel mask in Photoshop. | |||
'''Try on own paint''' - allows you to try on the paint you've created. | |||
'''Reload config''' - reloads hulls turrets paints from config.xml. | |||
'''FOV''' can abe adjusted using the slider at the bottom or a specific value. | |||
In addition to the garage functions, you can also press these keys: | |||
{{Hotkey|T}} - hide/show turret. | |||
{{Hotkey|H}} - hide/show hull. | |||
{{Hotkey|G}} - hide/show garage. | |||
{{Hotkey|Z}}{{Hotkey|X}}{{Hotkey|C}} - turret control. | |||
{{Hotkey|F}} - free camera mode. | |||
Free camera only: | |||
{{Hotkey|7}} / {{Hotkey|8}} / {{Hotkey|9}} - load camera position. | |||
{{Hotkey|Shift}} + {{Hotkey|7}} / {{Hotkey|8}} / {{Hotkey|9}} - load camera position from a file. | |||
{{Hotkey|Ctrl}} + {{Hotkey|Shift}} + {{Hotkey|7}} / {{Hotkey|8}} / {{Hotkey|9}} - memorize camera position and save it to a file. | |||
==Settings == | |||
Can be opened by clicking on the button [[File:Lobby7.png|link=]] or key {{Hotkey|~}}. | |||
[[File:ProTLVK settings.png|right|link=]] | |||
There are 4 sections: | |||
'''Graphics:''' | |||
# Similar to ProTanki. | |||
'''Control''' | |||
#You can customize each key in a similar way to ProTanki. | |||
'''Sound''' | |||
# You can turn the sound on or off. | |||
#Adjust the volume to your liking. | |||
#Background sound of the battle can also be turned on or off. | |||
'''Other:''' | |||
#'''Show debug panel''' - activates a panel with debugging information. | |||
# '''Show FPS''' - enables the display of FPS (frames per second). | |||
# '''Show tank modifications panel''' - in the center, at the top of the screen, the buttons to change the armament of the tank will appear. | |||
#'''Show camera axis indicator''' - enables the camera axis indicator in the lower left corner. | |||
#'''Alternate camera behavior''' - when enabled, objects above the tank will be visible on an inclined plane, and when entering a tunnel, the camera will follow the tank. | |||
# '''Show an arrow above selected spawn''' - enables the arrow above the spawn point. | |||
# '''Show an arrow above the selected tank''' - enables the arrow above the controlled tank. | |||
# '''Show marks of shots''' - when enabled, the turrets will leave gunshot marks. | |||
# '''Show main panel''' - activates the main panel with rank, crystals and buttons. | |||
# '''Show buy button''' - enables buy button. | |||
# '''Show CTF flags''' - enables CTF flags. | |||
# '''Show control points''' - enables CP points. | |||
# '''Show spawn points''' - enables spawn points on the map. | |||
# '''Show fake statistics''' - when enabled, decorative elements will appear at the bottom: ping, score and battle fund. These can be toggled by pressing {{Hotkey|F6}}. | |||
There is also a link to the official ProTLVK group at [https://vk.com/club197860056 VK]. | |||
==BoxViewer== | |||
An additional program that allows you to see the boxes with different textures for different holidays. It also contains the unused test boxes. | |||
To run it, simply open BoxViewer.exe | |||
[[File:ProTLVK boxviewer 2.png|link=]] | |||
==Folder Structure & Their Content== | |||
The ProTLVK Folder Structure is straightforward. Textures and models of hulls, turrets, paints, billboards, flags, skyboxes, and many other assets are stored inside the data folder and prop libraries, which are files containing textures and models for map props, reside in the library folder. The map folder is self-explanatory. | |||
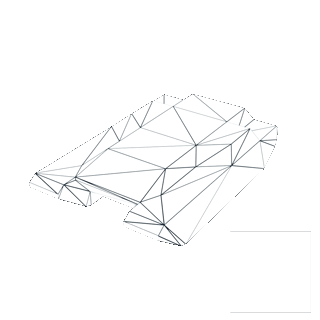
<div style="float: center; width: 50%;>[[File:ProTLVKFolderStructurePreview.png|link=]]</div> | |||
===Hulls and Turrets=== | |||
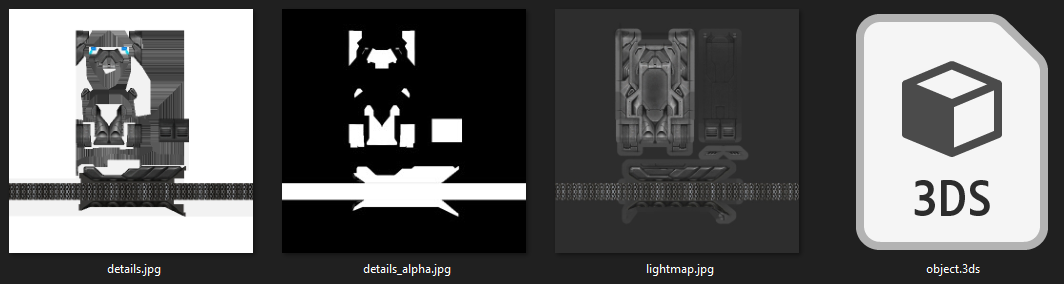
Every turret's and hull's modification has its separate folder: hull||turret\<item name>\<modification>. Every folder contains four files: details, details_alpha, lightmap, and a .3ds model. | |||
[[File:ezgif-1-603aefb31f.gif|link=https://wiki.pro-tanki.com/en/User:CreatorTheGreat]] | |||
<div style="float: center; width: 25%;>[[File:ProTLVKWikingPreview.png|link=]]</div> | |||
===Prop Libraries=== | |||
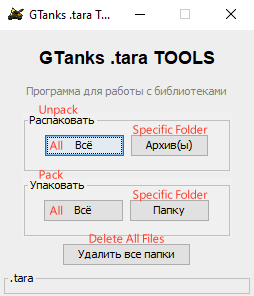
All models and textures are stored in a special archive format .tara. These are Tanki asset libraries and in order to see or edit their content, they need to be unpacked. | |||
Luckily besides more than 100 libraries there is a little program, taraGUI.exe, that can pack and unpack .tara libraries. | |||
[[File:GTanksTara.png|link=]] | |||
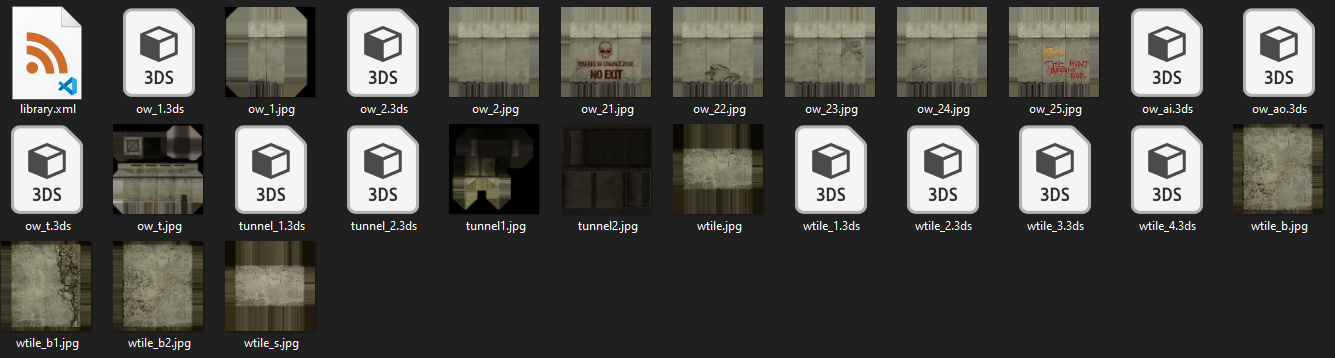
Library OuterWalls | |||
<div style="float: center; width: 50%;>[[File:LibraryExample.png|link=]]</div> | |||
==Installation == | |||
To install ProTLVK, you have to: | |||
*Download the ZIP file from the link below | |||
*Extract the archive somewhere on your computer | |||
*Open the ProTLVK folder | |||
* Run the ProTLVK.exe file | |||
'''Note:''' If you have Windows x32, you need to open FlashPlayer.exe and drag the TanksTestingTool.swf file into it. | |||
You can download it from [https://drive.google.com/file/d/1cNB68-64KThnWHC1AucCezY87M1sEwrq/view?usp=sharing here]. | |||
[[Category:Guides]] | |||
Latest revision as of 14:51, 11 February 2025
ProTanki Level Viewer Kit (ProTLVK) — a special tool that allows players to test different maps.
Often used by map makers and Content Creators for art.
How to use it?
The main panel is very similar to ProTanki. There are battles, garage, settings, sound, fullscreen mode and help buttons. There is also a rank and crystals panel, but these are mainly for decoration.

In the middle, there are map settings, where you can select a specific map, skybox, gravity and billboard. The disappearence time of boxes can also be adjusted here.
Setting up the map
List of maps

- Maps are divided into 4 categories: summer, winter, holiday and test.
- Test maps could appear on the main server.
Skyboxes
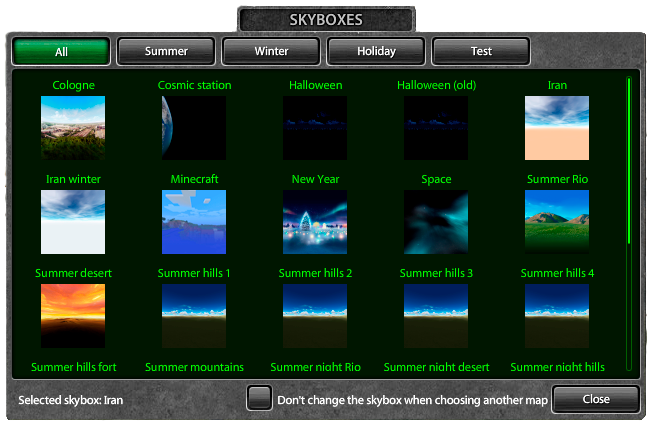
- By changing the skybox, the lighting on the map also changes.
- Skyboxes have 4 categories similarly to maps.
- Skyboxes with a number prefix at the end only differ in the direction of the shadows.
Gravity
- By clicking on the button, you can change the gravity of the map.
- 5 types of gravity: Default, Space, Moon, Madness and Madness 2.
Billboard
- When you click on the button, you can select the billboard of any holiday.
Launching the map
- To start the map, press the "Launch" button.

Now you can do whatever you want: add tanks, gold boxes, and even more.
Controls
Main:
Insert - add a tank.
Delete - delete current tank.
N - select next tank.
Shift + N - select previous tank.
Numpad 7 / Numpad 9 - change turret.
Numpad 4 / Numpad 6 - change hull.
Numpad 1 / Numpad 3 - change paint.
[ - select the previous weapon.
] - select the following weapons.
; - select the previous turret effect.
' - select the following turret effect.
1 / 2 / 3 / 4 / 5 / 6 - drop a supply.
F4 - open the hull physics editor for the current tank.
You can find all key bindings in the "Instruction.txt" file inside the archive.
Garage
Here you can see how the tank will look from different angles.
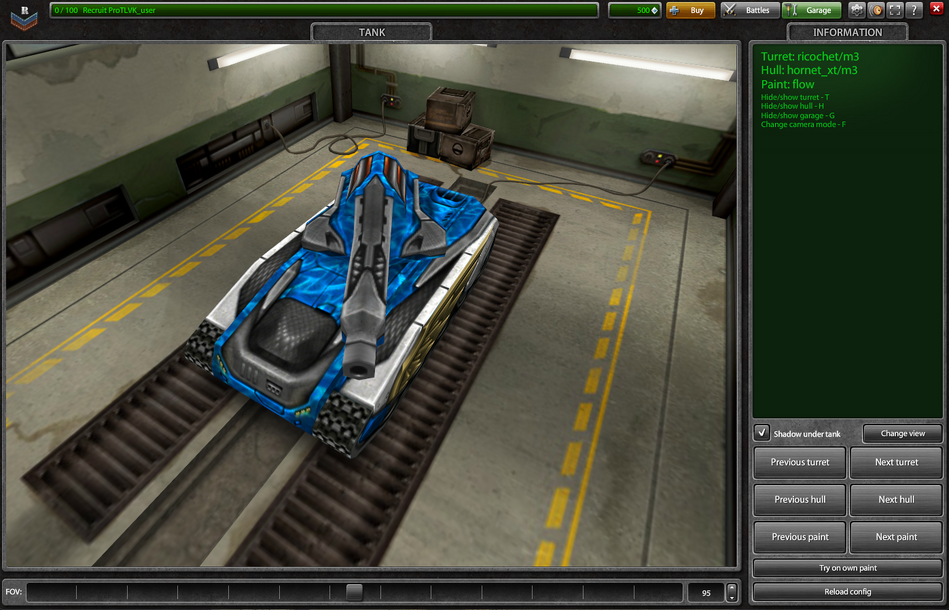
Change view - makes the tank white and the garage black, so you can cut the tank with the alpha channel mask in Photoshop.
Try on own paint - allows you to try on the paint you've created.
Reload config - reloads hulls turrets paints from config.xml.
FOV can abe adjusted using the slider at the bottom or a specific value.
In addition to the garage functions, you can also press these keys:
T - hide/show turret.
H - hide/show hull.
G - hide/show garage.
ZXC - turret control.
F - free camera mode.
Free camera only:
7 / 8 / 9 - load camera position.
Shift + 7 / 8 / 9 - load camera position from a file.
Ctrl + Shift + 7 / 8 / 9 - memorize camera position and save it to a file.
Settings
Can be opened by clicking on the button ![]() or key ~.
or key ~.
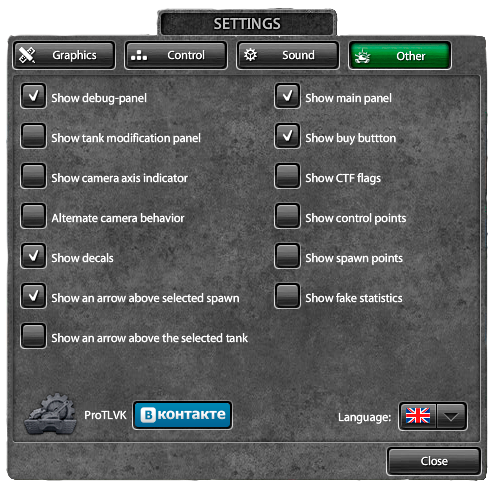
There are 4 sections:
Graphics:
- Similar to ProTanki.
Control
- You can customize each key in a similar way to ProTanki.
Sound
- You can turn the sound on or off.
- Adjust the volume to your liking.
- Background sound of the battle can also be turned on or off.
Other:
- Show debug panel - activates a panel with debugging information.
- Show FPS - enables the display of FPS (frames per second).
- Show tank modifications panel - in the center, at the top of the screen, the buttons to change the armament of the tank will appear.
- Show camera axis indicator - enables the camera axis indicator in the lower left corner.
- Alternate camera behavior - when enabled, objects above the tank will be visible on an inclined plane, and when entering a tunnel, the camera will follow the tank.
- Show an arrow above selected spawn - enables the arrow above the spawn point.
- Show an arrow above the selected tank - enables the arrow above the controlled tank.
- Show marks of shots - when enabled, the turrets will leave gunshot marks.
- Show main panel - activates the main panel with rank, crystals and buttons.
- Show buy button - enables buy button.
- Show CTF flags - enables CTF flags.
- Show control points - enables CP points.
- Show spawn points - enables spawn points on the map.
- Show fake statistics - when enabled, decorative elements will appear at the bottom: ping, score and battle fund. These can be toggled by pressing F6.
There is also a link to the official ProTLVK group at VK.
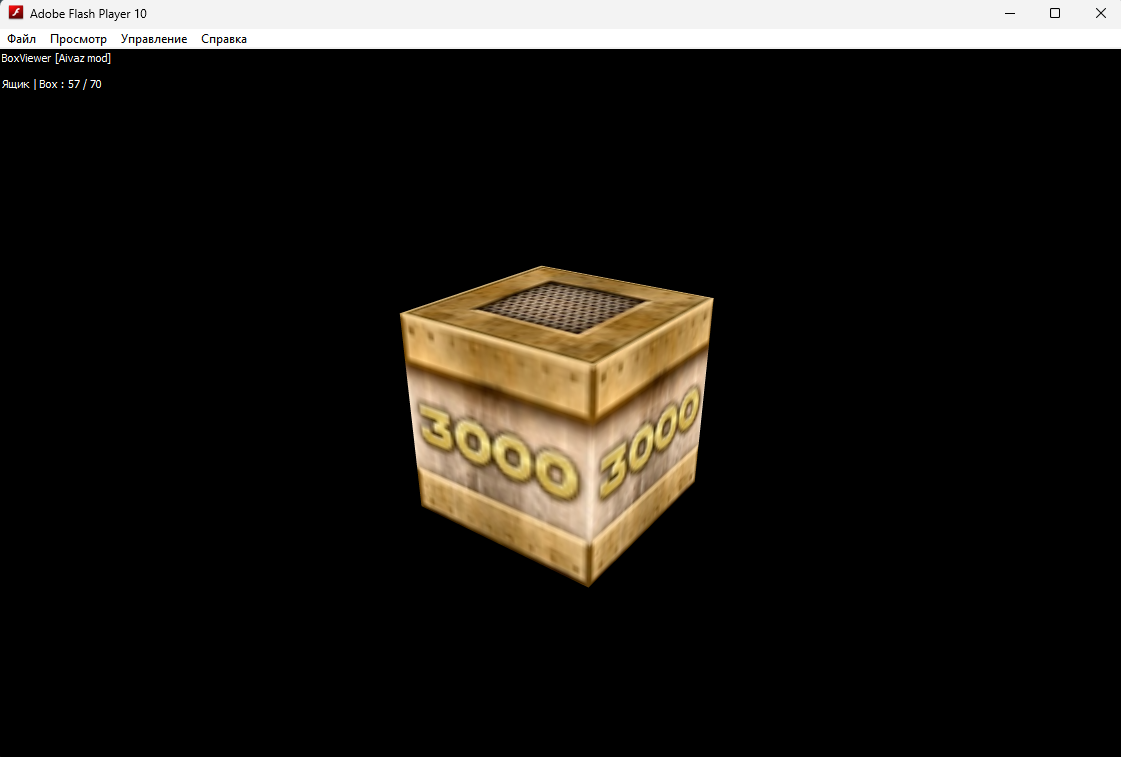
BoxViewer
An additional program that allows you to see the boxes with different textures for different holidays. It also contains the unused test boxes.
To run it, simply open BoxViewer.exe
Folder Structure & Their Content
The ProTLVK Folder Structure is straightforward. Textures and models of hulls, turrets, paints, billboards, flags, skyboxes, and many other assets are stored inside the data folder and prop libraries, which are files containing textures and models for map props, reside in the library folder. The map folder is self-explanatory.

Hulls and Turrets
Every turret's and hull's modification has its separate folder: hull||turret\<item name>\<modification>. Every folder contains four files: details, details_alpha, lightmap, and a .3ds model.
Prop Libraries
All models and textures are stored in a special archive format .tara. These are Tanki asset libraries and in order to see or edit their content, they need to be unpacked. Luckily besides more than 100 libraries there is a little program, taraGUI.exe, that can pack and unpack .tara libraries.
Library OuterWalls
Installation
To install ProTLVK, you have to:
- Download the ZIP file from the link below
- Extract the archive somewhere on your computer
- Open the ProTLVK folder
- Run the ProTLVK.exe file
Note: If you have Windows x32, you need to open FlashPlayer.exe and drag the TanksTestingTool.swf file into it.
You can download it from here.