Railgun: Difference between revisions
Jump to navigation
Jump to search
(((ME))) |
(→Table of characteristics: Updated ((ME))) |
||
| Line 7: | Line 7: | ||
If mid-caliber guns are not enough for your self-expression, this weapon is right for you. Large-caliber gun with huge muzzle speed and shells using depleted uranium. Extremely powerful and accurate kinetic projectile can go right through the enemy's tank or hit several targets standing on the line of fire with a single shot. An ideal choice for long-range trench warfare and sniping. Remember that it takes a lot of time to recharge the gun and make sure your opponents will not take advantage of it. | If mid-caliber guns are not enough for your self-expression, this weapon is right for you. Large-caliber gun with huge muzzle speed and shells using depleted uranium. Extremely powerful and accurate kinetic projectile can go right through the enemy's tank or hit several targets standing on the line of fire with a single shot. An ideal choice for long-range trench warfare and sniping. Remember that it takes a lot of time to recharge the gun and make sure your opponents will not take advantage of it. | ||
==Table of | == Table of Characteristics == | ||
{| class="wikitable" style="margin:auto" | |||
{|class="wikitable" style=" | |||
!Modification | !Modification | ||
!M0 | !M0 | ||
| Line 16: | Line 15: | ||
!M3 | !M3 | ||
|- | |- | ||
|Available from | |style="text-align:left;"|'''Available from rank''' | ||
| | |{{Rank/03|size=normal}} | ||
| | |{{Rank/10|size=normal}} | ||
| | |{{Rank/17|size=normal}} | ||
| | |{{Rank/25|size=normal}} | ||
|- | |- | ||
|- | |style="text-align:left;"|'''View from Garage''' | ||
|View | |||
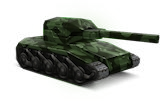
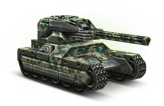
|[[File:Turret_railgun_m0.png|center|link=]] | |[[File:Turret_railgun_m0.png|center|link=]] | ||
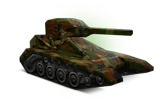
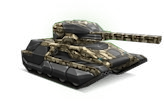
|[[File:Railgun1.png|center|link=]] | |[[File:Railgun1.png|center|link=]] | ||
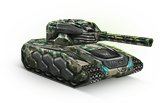
| Line 29: | Line 27: | ||
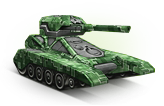
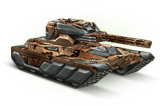
|[[File:Railgun3.png|center|link=]] | |[[File:Railgun3.png|center|link=]] | ||
|- | |- | ||
|style="text-align:left;"| | |style="text-align:left;"|'''Price''' | ||
|800 | |{{price|800}} | ||
|17 600 | |{{price|17 600}} | ||
|79 200 | |{{price|79 200}} | ||
|199 300 | |{{price|199 300}} | ||
|- | |- | ||
|style="text-align:left;"|[[File:MinMax dmg.png|link=HUD#Turrets]] | | colspan="5" |<b>Upgradable Parameters</b> | ||
|- | |||
|style="text-align:left;"|'''[[File:MinMax dmg.png|link=HUD#Turrets]] Minimum Damage''' {{Hint|The minimum damage dealt to an enemy per shot.}} | |||
|68 | |68 | ||
|90 | |90 | ||
| Line 41: | Line 41: | ||
|133 | |133 | ||
|- | |- | ||
|style="text-align:left;"|[[File:MinMax dmg.png|link=HUD#Turrets]] | |style="text-align:left;"|'''[[File:MinMax dmg.png|link=HUD#Turrets]] Maximum Damage''' {{Hint|The maximum damage dealt to an enemy per shot.}} | ||
|106 | |106 | ||
|137 | |137 | ||
| Line 47: | Line 47: | ||
|199 | |199 | ||
|- | |- | ||
|style="text-align:left;"|[[File: | |style="text-align:left;"|'''[[File:Impact force.png|link=HUD#Turrets]] Impact force''' {{Hint|The physical force of the turret’s projectile on an enemy tank, causing displacement.}} | ||
|369.58 | |369.58 | ||
|479.72 | |479.72 | ||
|589.86 | |589.86 | ||
|700 | |700.0 | ||
|- | |- | ||
|style="text-align:left;"| | |style="text-align:left;"|'''Recoil''' {{Hint|The physical impact of the turret on its own hull when firing.}} | ||
|213. | |213.80 | ||
|242.53 | |242.53 | ||
|271.27 | |271.27 | ||
|300 | |300.0 | ||
|- | |- | ||
|style="text-align:left;"|[[File:Turret Turning Speed (degrees-s).png|link=HUD#Turrets]] | |style="text-align:left;"|'''[[File:Turret Turning Speed (degrees-s).png|link=HUD#Turrets]] Turret rotation speed (°/s)''' {{Hint|The maximum speed at which the turret can rotate.}} | ||
|56.2 | |56.2 | ||
|70.0 | |70.0 | ||
| Line 77: | Line 65: | ||
|97.4 | |97.4 | ||
|- | |- | ||
|style="text-align:left;"| | |style="text-align:left;"|'''Turret rotation acceleration (°/s²)''' {{Hint|The acceleration at which the turret reaches its maximum rotation speed.}} | ||
|69.6 | |69.6 | ||
|80.0 | |80.0 | ||
| Line 83: | Line 71: | ||
|100.84 | |100.84 | ||
|- | |- | ||
|style="text-align:left;"|[[File: | |style="text-align:left;"|'''[[File:Reload time (s).png|link=HUD#Turrets]] Reload time (s)''' {{Hint|The total time between two shots, including charge and delay.}} | ||
|7.006 | |||
|6.504 | |||
|6.002 | |||
|5.500 | |||
|- | |||
|style="text-align:left;"|'''Charge time (s)''' {{Hint|The pause between the moment of firing and readiness for the next shot.}} | |||
|5.846 | |||
|5.377 | |||
|4.909 | |||
|4.440 | |||
|- | |||
|style="text-align:left;"|<abbr>'''Delay (s) {{Hint|The time interval between pressing the fire button and the actual shot, known as the "warm-up."}}'''</abbr> | |||
|1.160 | |||
|1.127 | |||
|1.093 | |||
|1.060 | |||
|- | |||
|style="text-align:left;"|'''[[File:Penetration.png|link=HUD#Turrets]] Piercing Damage (%) {{Hint|The percentage of damage dealt to the next tank in line. If multiple tanks are in the shot’s path, each subsequent tank receives reduced damage equal to a percentage of the damage dealt to the previous one.}}''' | |||
|35.4 | |35.4 | ||
|56.9 | |56.9 | ||
|78.4 | |78.4 | ||
|100 | |100.0 | ||
|- | |||
| colspan="5" |<b>Non-upgradable Parameters</b> | |||
|- | |- | ||
|style="text-align:left;"| | |style="text-align:left;"|'''Auto-aim angle up (°)''' {{Hint|The angle of automatic targeting when the enemy is above the turret’s aiming plane.}} | ||
| | |6 | ||
|6 | |||
|6 | |||
|6 | |||
|- | |- | ||
|style="text-align:left;"| | |style="text-align:left;"|'''Auto-aim angle down (°)''' {{Hint|The angle of automatic targeting when the enemy is below the turret’s aiming plane.}} | ||
| | |9 | ||
|9 | |||
|9 | |||
|9 | |||
|} | |} | ||
Revision as of 07:16, 26 February 2025
See also: Turrets, How to Use Railgun (Tips and Tricks)
See other variant: Railgun XT
Description in Garage
If mid-caliber guns are not enough for your self-expression, this weapon is right for you. Large-caliber gun with huge muzzle speed and shells using depleted uranium. Extremely powerful and accurate kinetic projectile can go right through the enemy's tank or hit several targets standing on the line of fire with a single shot. An ideal choice for long-range trench warfare and sniping. Remember that it takes a lot of time to recharge the gun and make sure your opponents will not take advantage of it.
Table of Characteristics
| Modification | M0 | M1 | M2 | M3 |
|---|---|---|---|---|
| Available from rank | 
|

|

|

|
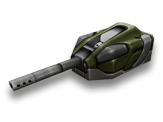
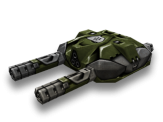
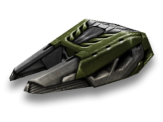
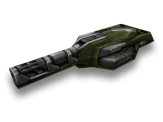
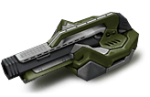
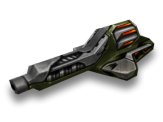
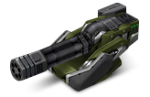
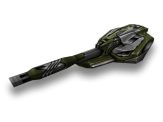
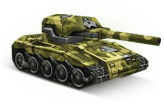
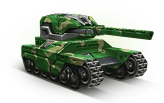
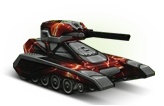
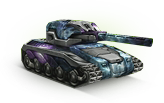
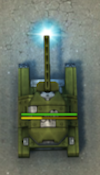
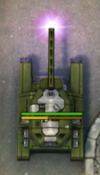
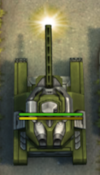
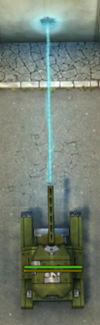
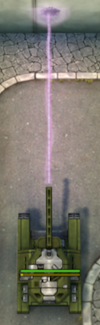
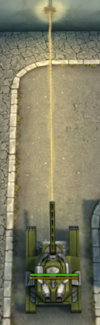
| View from Garage | 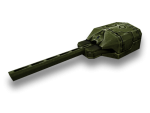 |
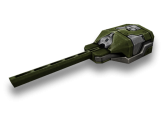 |
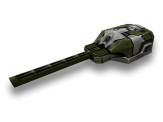 |
 |
| Price | 800 |
17 600 |
79 200 |
199 300 |
| Upgradable Parameters | ||||
| 68 | 90 | 111 | 133 | |
| 106 | 137 | 168 | 199 | |
| 369.58 | 479.72 | 589.86 | 700.0 | |
| Recoil |
213.80 | 242.53 | 271.27 | 300.0 |
| 56.2 | 70.0 | 78.5 | 97.4 | |
| Turret rotation acceleration (°/s²) |
69.6 | 80.0 | 90.4 | 100.84 |
| 7.006 | 6.504 | 6.002 | 5.500 | |
| Charge time (s) |
5.846 | 5.377 | 4.909 | 4.440 |
| Delay (s) |
1.160 | 1.127 | 1.093 | 1.060 |
| 35.4 | 56.9 | 78.4 | 100.0 | |
| Non-upgradable Parameters | ||||
| Auto-aim angle up (°) |
6 | 6 | 6 | 6 |
| Auto-aim angle down (°) |
9 | 9 | 9 | 9 |
Protection Paints
The following Paints have protection ![]() against Railgun:
against Railgun:
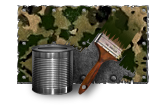
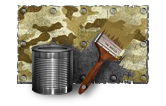
| Chainmail | Corrosion | Forester | Winter | Emerald | Fracture |
|---|---|---|---|---|---|
|

|

|
|

|

|
| 5% | 10% | 12% | 12% | 15% | 16% |
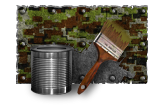
| Savanna | Blacksmith | Tiger | Raccoon | Dirty | Tundra |

|

|

|

|

|
|
| 16% | 18% | 18% | 21% | 24% | 27% |
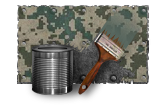
| Picasso | Clay | Sandstone | Digital | Prodigi | |

|
|
|
|
|
|
| 27% | 30% | 34% | 35% | 50% |
Kits including Railgun
Railgun can be purchased from the following Product kits:
M0


M1


M2


M3


Shot Effects
| Phase | M0 | M1 | M2 | M3 |
|---|---|---|---|---|
| Warm Up | 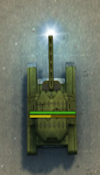
|
|
|
|
| Shot | 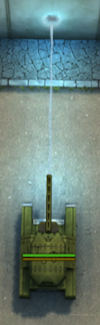
|
|
|
|